Panoramic photography
Panoramic photography is a genre of photography or technique that involves creating images with exceptionally wide fields. This is almost always a photograph that will be in landscape mode. A panoramic photography therefore appears in a very elongated format.
The height/width ratio should therefore be approximately 1/3. However, some photographers consider that from the 1/2 ratio it is a panoramic photograph.
- report 1/1,5 corresponding to the format …… 24 x 36
- report 1 / 2 or a format equivalent …………………….. 24 x 48
- report 1 / 3 or a format equivalent …………………….. 24 x 72
Summary
- Concept of field of vision and viewing angle
- How to get a panoramic photograph
- Panorama by assembling several photos
- Software for stitching Panoramic photography
- Panorama stitching software
- Panorama assembly test
- Projection methods
- Elements of our panorama
- Stitching a Panoramic photography with Capture One Pro
- Stitching a Panoramic photography with Affinity photo
- Comparison of our two panoramas
- Conclusion
Concept of field of vision and viewing angle
Independently of the aspect ratio of a photo, the angle of field encompassed by the photograph must also be taken into account. This angle of view will depend on the lens you use on your camera.
The angle of view of a lens is measured in degrees. If it can be given horizontally and vertically, most manufacturers have gotten into the habit of giving it for the diagonal of the frame. This is the case with Nikon which gives the diagonal angle of view for its lenses.
Each focal length therefore corresponds to an angle of field :
for a lens of 20mm (format 24 x 36) angle of field 94°
- diagonal angle of view 94,50°
- horizontal angle of view 84°
- vertical angle of view 62°
with a lens of 35mm (format 24 x 36) angle of field 63°
- diagonal angle of view 63°
- horizontal angle of view 54°
- vertical angle of view 38°
with a lens of 50mm (format 24 x 36) angle of field 46°
- diagonal angle of view 46°
- horizontal angle of view 40°
- vertical angle of view 27°
The field of view also varies with the distance between the camera and the subject. So the further you move away from the subject, the more the field of vision increases.
- The greater the field angles, the greater the field of vision,
- The greater the distance with the camera, the greater the field of view.
Table of fields of vision according to the focal length of the lens
| Objectif Focal of the lens |
Angle de champ (diagonal) Angle of view (diagonal) |
|---|
| 14 mm | 114° |
| 18 mm | 100° |
| 20 mm | 94° |
| 24 mm | 83°50' |
| 28 mm | 75° |
| 35 mm | 63°20' |
| 50 mm | 46°40' |
| 85 mm | 28°30' |
| 105 mm | 24° |
| 135 mm | 18° |
| 200 mm | 12°10' |
| 300 mm | 8°15' |
| 400 mm | 6°10' |
| 500 mm | 5° |
| 600 mm | 4°10' |
How to get a panoramic photography
However, a panoramic photograph can be obtained in several ways:
- The most basic solution, by cropping a photo in landscape mode, to give it a width/height ratio allowing you to have the desired panoramic effect.
- By use of a special camera.
- By assembling several preliminary shots with specific software.
However, digital photography has greatly facilitated the production of panoramic photography.
By cropping a photograph

This very simple solution, however, has several disadvantages:
- limitation of the panorama linked to the lens used and the distance between the camera and the subject.
- loss of definition linked to the very significant cropping of the photograph.
By using a specific camera
This method was mainly used with film cameras. However, two types of film cameras were used for this type of panoramic photography:
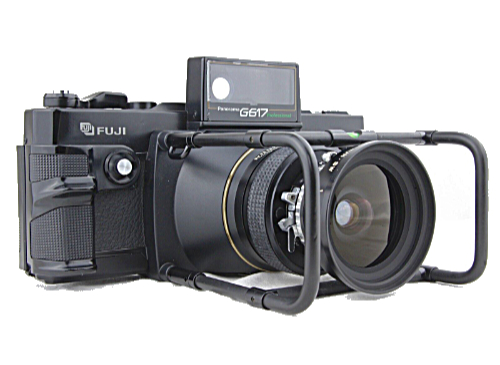
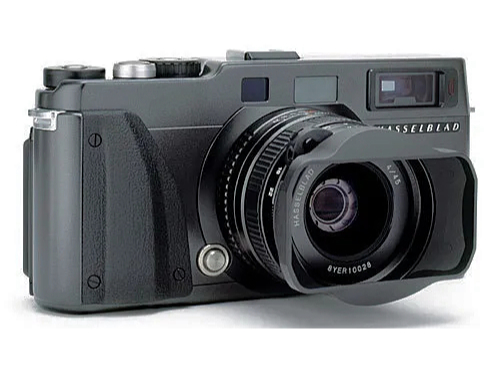
- elongated format devices such as :
- the Fuji G617, format 60 x 170mm on film 120 (report of de 2,80)
- the Hasselblad Xpan, format 24 x 65 mm on film 135 (report of 2,70)
- the Linhof 617, format 57 x 172 mm on film 120 or 220 (report of 3,00 )
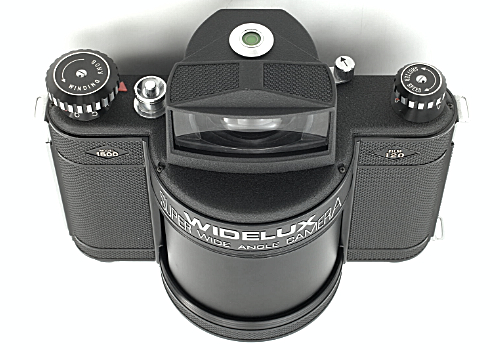
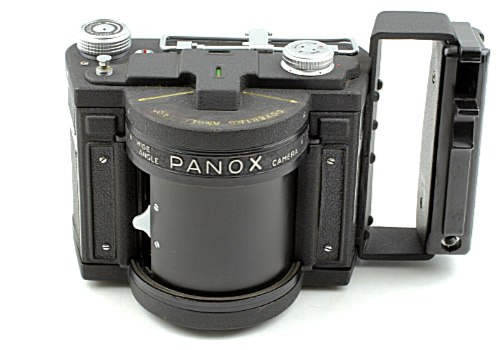
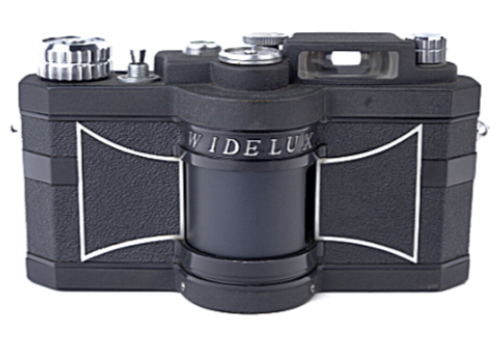
- rotating plate devices. These are devices specially designed for this type of photography. The camera lens rotates while shooting. This short focal length lens is fixed on a turret, which rotates when triggered, and thus moves in front of the 135 film arranged in an arc and covering a format of 24 x 66mm (ratio 2.75)
Elongated format devices


Rotating plate devices

Some digital cameras offer a built-in panoramic photography function. The software embedded in these digital devices (compacts, smartphones, or others) sometimes makes it possible to assemble several images in a few seconds to produce a panoramic photograph.
By assembling several photos
Creating a panorama by stitching consists of taking several photos with common overlapping areas, and then stitching them together using software. However, producing a panorama by assembling several photos involves a minimum of rules or constraints to achieve a satisfactory result.
Panoramic photography by assembling several photos
Creating a panorama by assembling several photos involves a certain number of rules or constraints:
Camera setting :
The choice of focal length :
In full format (24 x 36 mm), a focal length of 35mm or 50mm is a wise choice. A shorter focal length such as 24mm can be used if you don’t have enough perspective, but be careful of the distortion of your panorama during assembly.
Basic settings for your camera :
- The exposure of your photos intended for your panorama should be as regular as possible.
- Choosing an aperture between 8 and 11 is an average which allows you to take care of the depth of field. It is therefore preferable to work in aperture priority mode, in order to maintain the same aperture and therefore the same depth of field on all the photos that will make up the panorama. If the exposure must vary from one shot to another, which is possible by scanning a large field, only the speed will vary to correct the exposure differences.
- Favor shooting in Raw, in order to be able to correctly process and correct the different shots that will make up your panorama.
Rules during shooting :
Taking photos must be done with some precautions and respect some points:
- The use of a tripod is strongly recommended; scanning the panorama on a perfectly horizontal axis is necessary. A panoramic head or a head with a spirit level will be a plus (but not an obligation). Handheld shooting is possible, but can cause problems that we will see later. (1)
- Each photo should be taken with an overlap of approximately 30%. This overlap will be necessary to allow the software to find the stitching points of your panorama, and correct tonal differences (in the sky in particular).
- Take photos in portrait or landscape mode, both options are possible, then it all depends on the importance of your panorama and the use of it.
- Landscape mode (camera in horizontal position) can be used for a small panorama, however if you need to take a larger number of photos your panorama may lack height. In this landscape mode you also risk being bothered by the lack of height (shot in the mountains or of a building such as a cathedral)
- Portrait mode (device in vertical position) is preferable. It will simply require you to take a few more photos compared to landscape mode to cover the same panorama. In return you will have a panorama which will have better definition.
Why a better definition :
Example : you used a 24 x 36 camera with 45 million pixels (8,256 × 5,504) for your shots.
Same width panorama
- You have created a panorama in landscape mode of 3 shots, the size of your panorama will be approximately:
– panorama height : 5 504 pixels,
– panorama width : 8 256 x 3 pictures = 24 768 pixels, minus the overlap of 30% on 2 pictures(8 256 x 30% x 2 = 4 954 pixels) or an effective width of 24 768 – 4 954 = 19 814 pixels.
The final definition of your panorama in this case will be 5 504 x 19 814 pixels either a definition of 109 058 458 pixels. Your panorama has an aspect ratio of 19 814 / 5 504 = 3,60 - If you want to take a panorama of the same width with the camera in a vertical position (photo taken in portrait mode) you will take 5 photos instead of three:
– panorama height : 8 256 pixels, (the width of the sensor becomes the height of the panorama.)
– panorama width : 5 504 x 5 photos = 27 520 pixels, less than 30% overlap on 4 pictures (5 504 X 30% x 4 = 6 605 pixels) either an effective width of 27 520 – 6 605 = 20 915 pixels.
The definition of your panorama in this case will be 8 256 x 20 915 pixels, either a definition of 172 675 891 pixels. Your panorama has an aspect ratio of 20 915 / 8 256 = 2,50. In this case we see that our panorama presents a significantly higher definition, 172 675 891 pixels instead of 109 058458 pixels for a substantially identical width, but a lower aspect ratio 2.50 instead of 3,60.
Same report panorama
- If you want to take a panorama with the camera in a vertical position (photo taken in portrait mode) with an aspect ratio close to 3.60 (1st case with 3 shots) you must increase the number of photos. We will take 7 photos instead of three:
– panorama height ; 8 256 pixels,
– panorama width : 5 504 x 7 photos = 38 528 pixels, less than 30% overlap on 6 pictures (5 504 x 30% x 6 = 9 907 pixels) either an effective width of 38 528 – 9 907 = 28 621 pixels.
The definition of your panorama in this case will be 8 256 x 28 621 pixels, either a definition of 236 293 325 pixels. Your panorama has an aspect ratio of 28 621 / 8 256 = 3,47 (getting closer to 3,60)
How to determine the number of photos needed for your panorama :
You will need to divide the angle of view of your panorama by the angle of view of the lens used, minus the overlapping areas.
Example :
– Using a full-frame sensor 24 x 36 mm ,
– Camera in vertical position,
– Focale of lens 35 mm, the vertical field angle in this case is 38°.
If you want to photograph a scene that is 180°, respecting an overlap zone of 30%, we will have to take 180° / (38° x 70%) = 7 pictures.
In practice, it will sometimes be difficult to determine the angle of view of the scene you want to encompass in your panorama.
Rotating the camera while shooting
The rotation of the device can be done freehand or on a stand. Rotation on a stand will be preferable especially if you plan a panorama composed of a large number of photos. It will be much easier to control the rotation by maintaining a perfectly horizontal plane (with a head equipped with a spirit level), as well as the overlap between the different shots to compose your panorama.
Finally, another important element in panoramic photography, the rotation of the camera must be carried out around the nodal point. This element is very important in order to avoid any assembly fault (or impossibility of assembly) of your panorama by the software you will use.
To put it simply and without wanting to go into an optics course, the nodal point (but we should rather use the term entrance pupil) is the point of convergence of the beams of light in your lens, it is located in the plane of the lens diaphragm. The axis of rotation of your camera should therefore be located not under the body, but under this nodal point of the optics. This axis of rotation will therefore be located just vertically from this nodal point in the extension of the axis of rotation of your panoramic head. You will therefore understand why it can be difficult to perform a correct rotation freehand.
Software for stitching Panoramic photography
There are many software programs for stitching panoramas. I have listed a certain number of them, however some are old or not up to date with the current version of the OS of our computers.
Panorama stitching software
Some are software dedicated exclusively to this function such as:
- Photovista Panorama 3.5 (Windows) old version 2010
- Autopano of Société Kolor old version is no longer maintained
- Hugin (version Windows and Mac) distributed under free license, last update 11/2023
- PTGui (version Windows Mac and Linux) commercial software
- AutoStitch 2.2 (Windows) Last update 2019
- Panorama Factory (Windows and Mac) old version, is no longer updated
- Image Composite ICE – Microsoft Research (Windows) freeware (free software)
- PanoramaStudio 4.0 Pro of tshsoft (Windows and Mac) commercial software
Some are image processing software including a “Panorama” function:
- Photo Stitch of Ste Canon (Windows and Mac)
- Photoshop of Adobe (with Photomerge)
- Lightroom ofAdobe (Windows and Mac)
- Capture One Pro of Phase One (Windows and Mac)
- Affinity Photo of Sérif (Windows and Mac)
Panorama assembly test
Personally I use Capture One Pro to manage my photo library, and Affinity Photo for various jobs, so I tested the panorama function of each of these two software.
Projection methods
Before moving on to assembling our panorama, you should know that there are several projection methods:
- Spherical projection :
This is a curved projection, this projection gives a more compact panorama. Used for panoramas that cover an extremely wide field, up to 360°. - Cylindrical projection :
It is also a curved projection, it gives more height dynamics, it is recommended for panoramas with a field of view of around 100 degrees. With this projection, the vertical lines remain straight, but the horizontal lines tend to be curved and there are stretching effects in the panorama. - Perspective projection :
The classic projection mode, a perspective with three vanishing points. In this mode, the lines always remain straight, and aims to simulate the field of vision corresponding to a wide angle lens. This projection is also useful for a field of view less than about 100 degrees. - Panini projection :
Beyond 100° and up to 180°, the ‘Panini’ projection allows a linear-appearing perspective without “curving” the vanishing lines or excessively stretching the edges of the image.
The photographer Hervé Sentucq uses exclusively the “Panini” projection in his panoramas of more than 100° horizontal field.
See his site : https://www.panoram-art.com/
Elements of our panorama
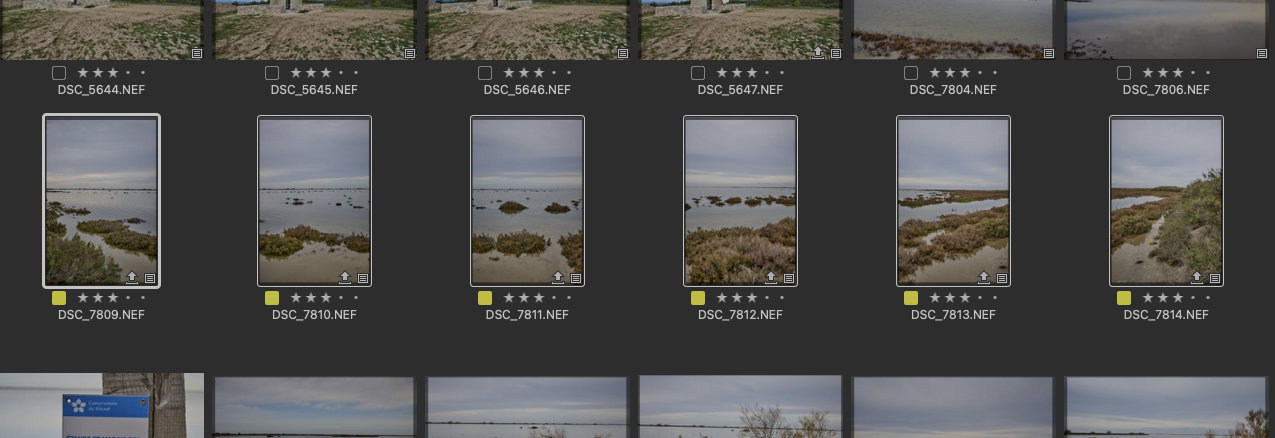
We will see below how to create a panorama with these two software programs. This panorama will be composed of 6 photos taken in portrait mode with a Nikon Z9 in DX mode, either photos each with a definition of 5,392 x 3,592 pixels. Focal length used 24 mm or 35mm in DX equivalence. The coverage during shooting is estimated at around 20%.
In theory we should have a panorama with the following dimensions:
- height 5 392 pixels
- width : 3 592 x 6 pictures = 21 552 pixels, minus the estimated recovery of 20% on 5 pictures either 3 592 x 20% x 5 = 3 592 pixels final width : 21 552 – 3 592 = 17 960 pixels
- Our panorama should theoretically have a dimension of 5 392 x 17 960 pixels
Stitching a Panoramic photography with Capture One Pro
The operation :
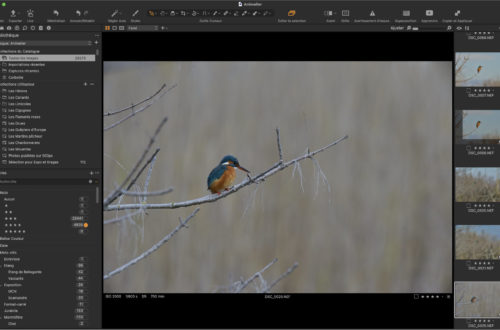
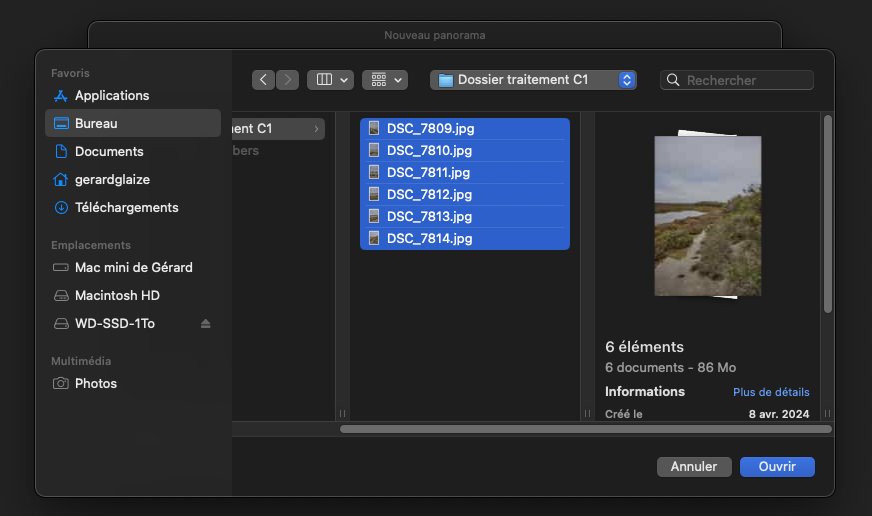
First operation, select from the CO photo library the photos that will make up our panorama, in this case 6 photos in portrait mode. We can directly use NEF (Nikon Raw) format files already processed in CO.
Select the “Assemble in Panorama” option in the “Image” Menu – The following window appears:
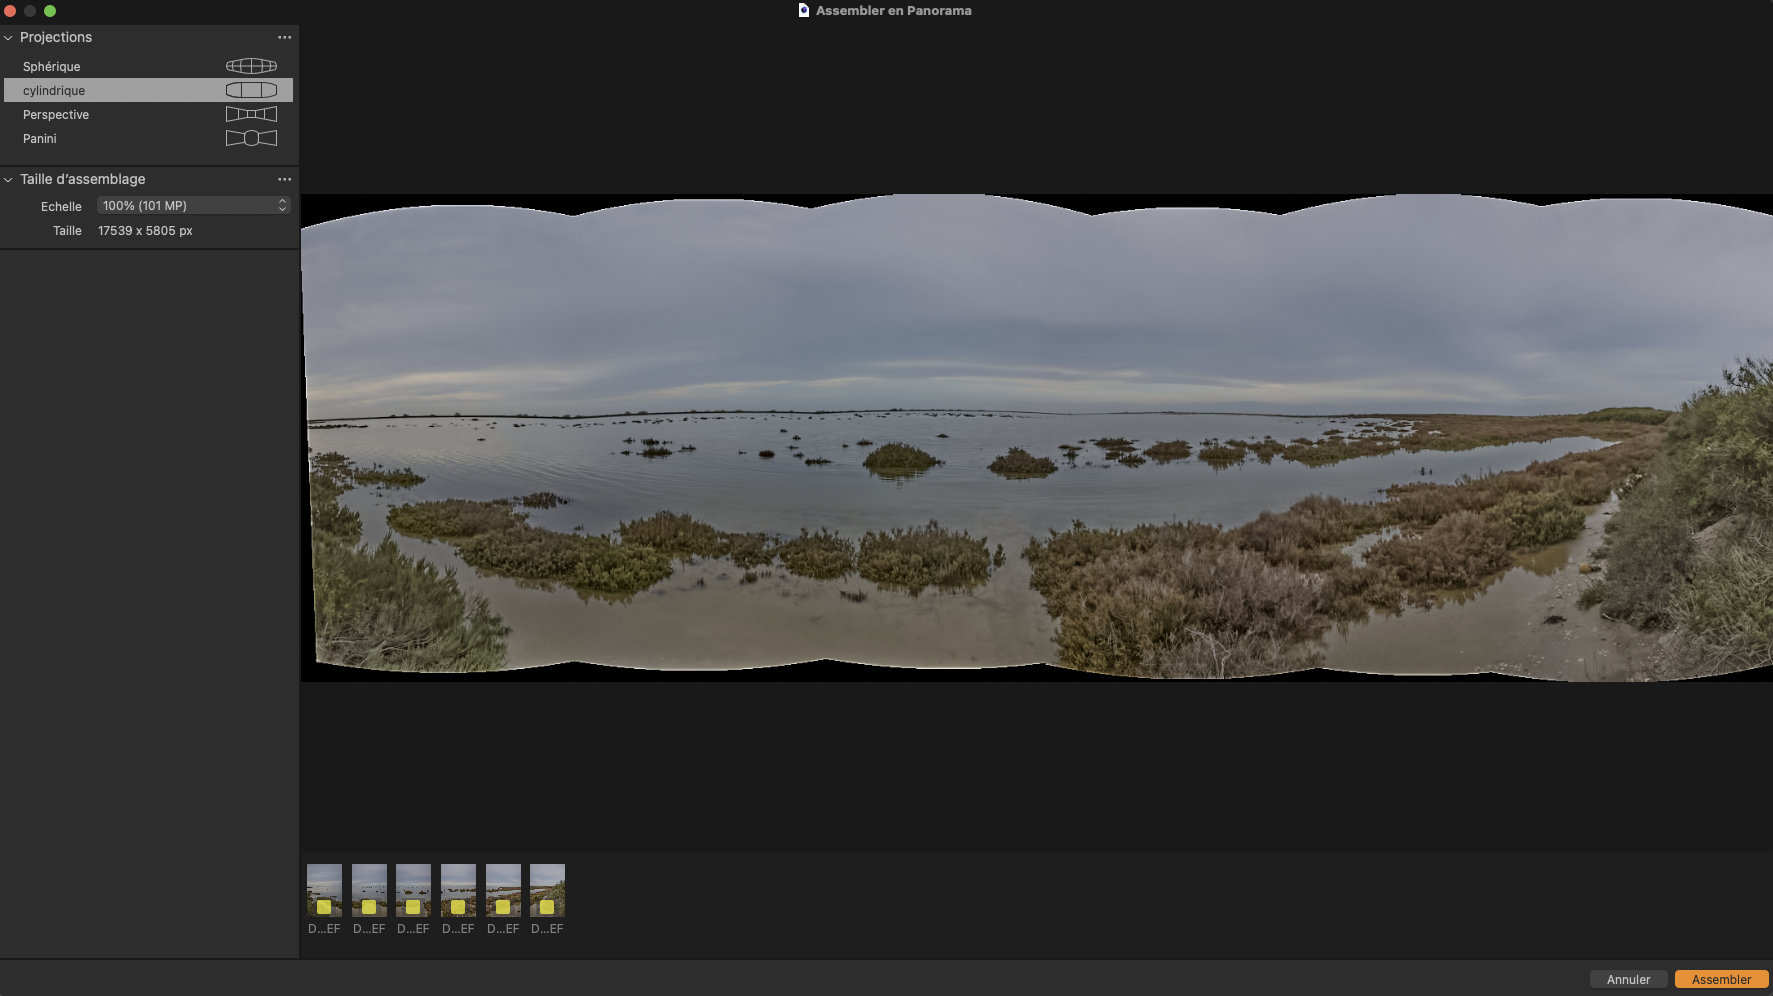
The software offers us 4 projection modes (Spherical – Cylindrical – Perspective – Panini) for assembly as well as an assembly size. At the bottom left appear the 6 thumbnails of the photos in our panorama. All that remains is to validate “Assemble”, if everything seems correct to us.
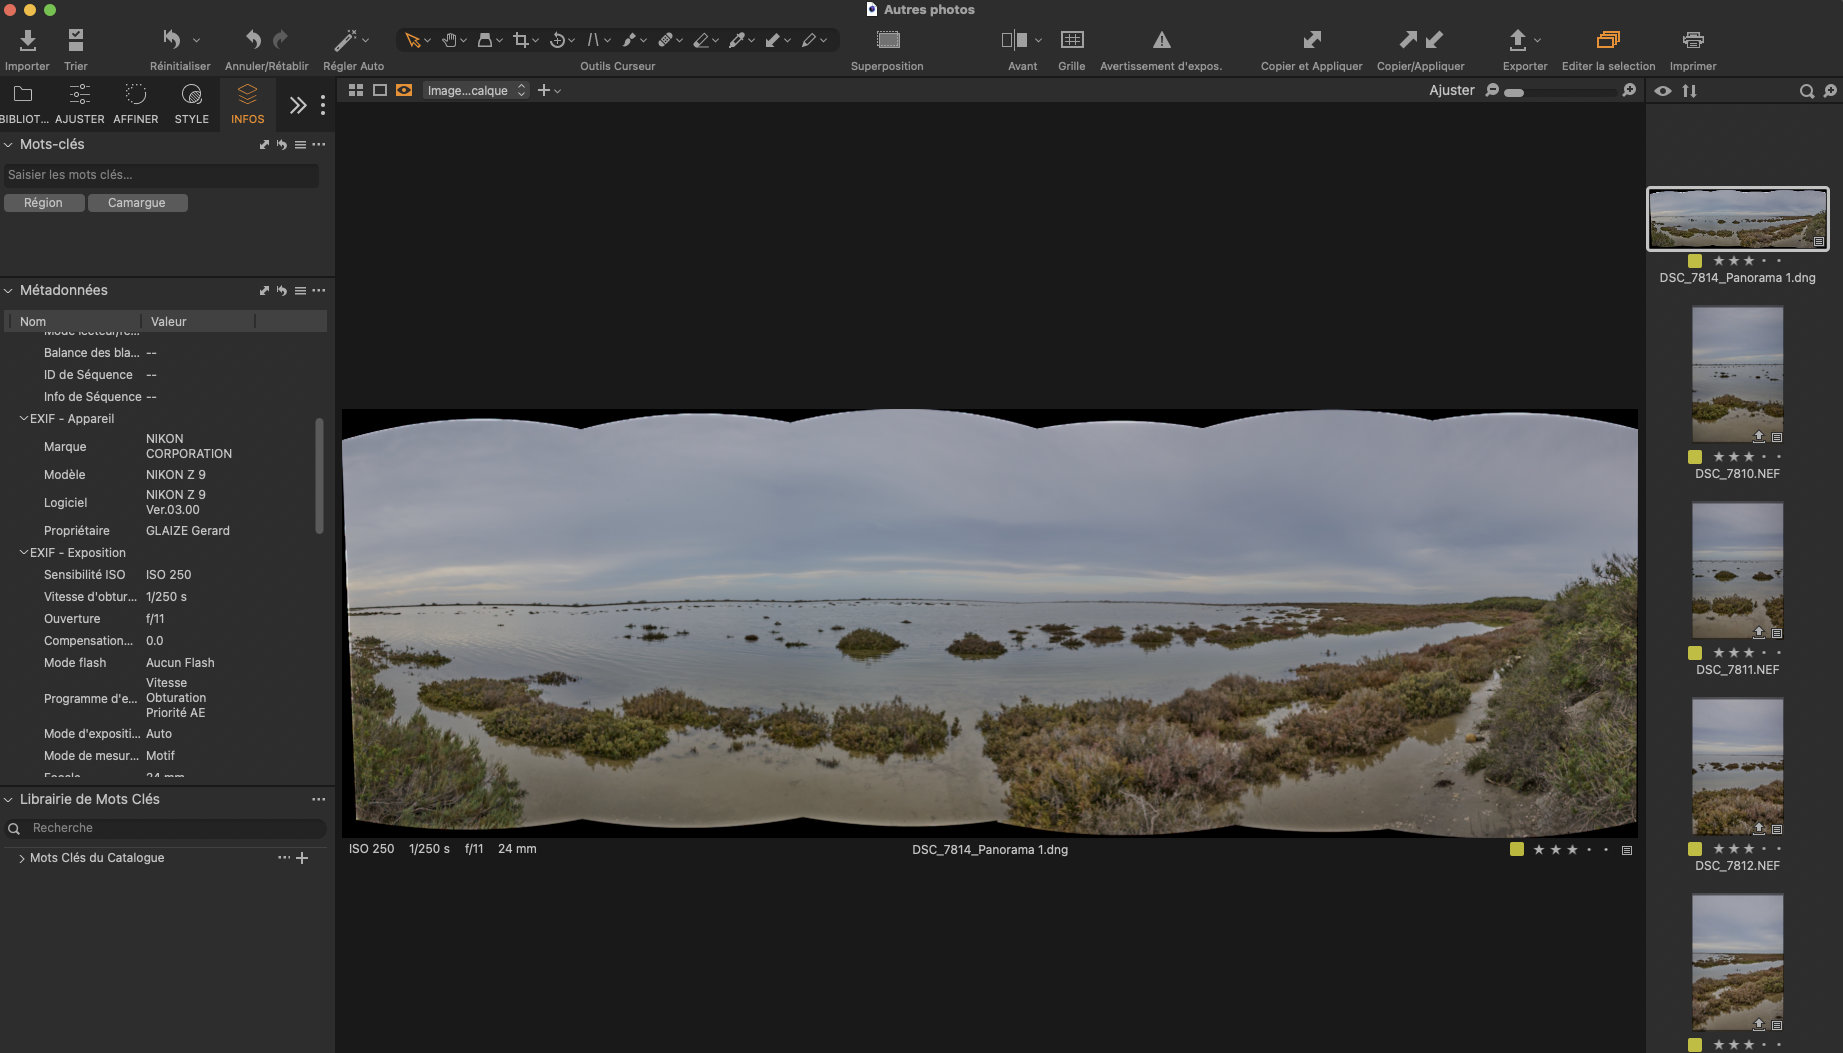
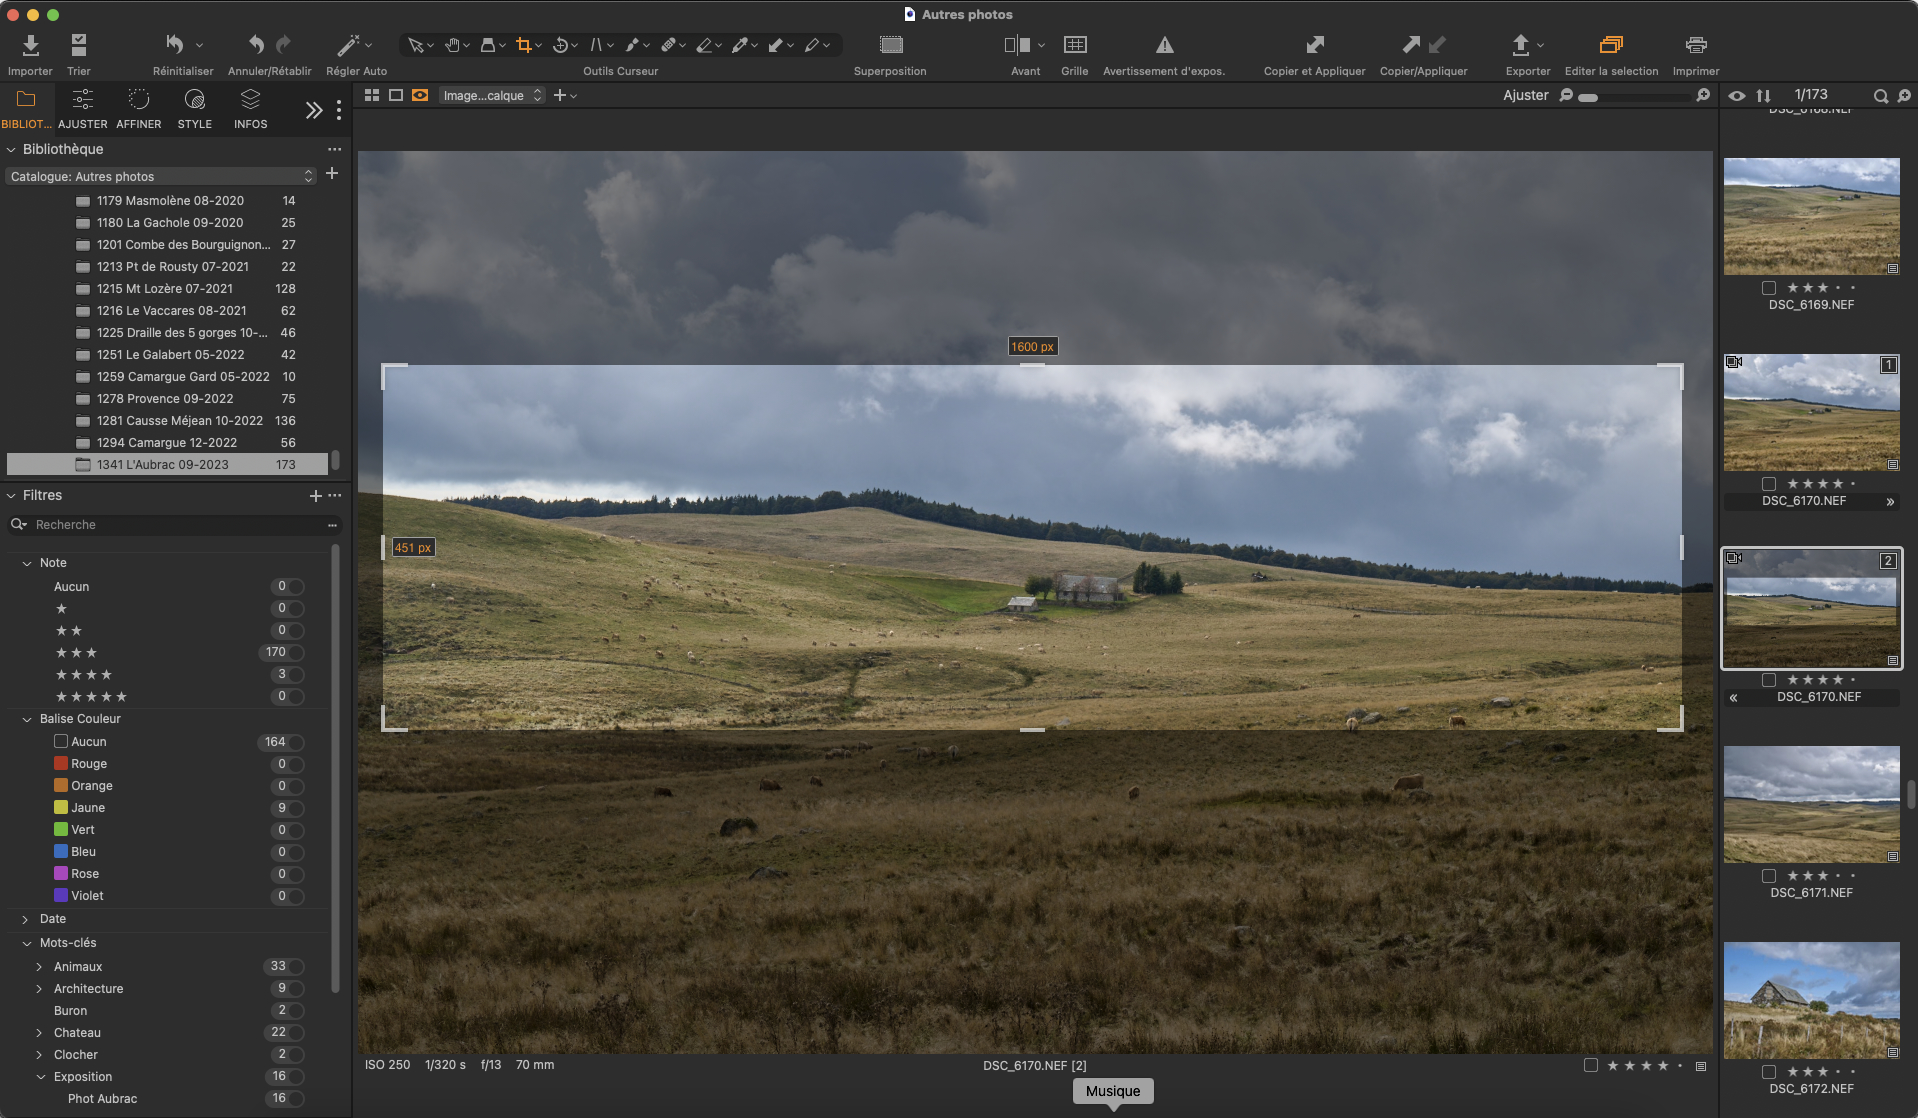
After confirming “Assemble” our panorama appears. Capture One creates a file for our panorama in dng format in the photo library.
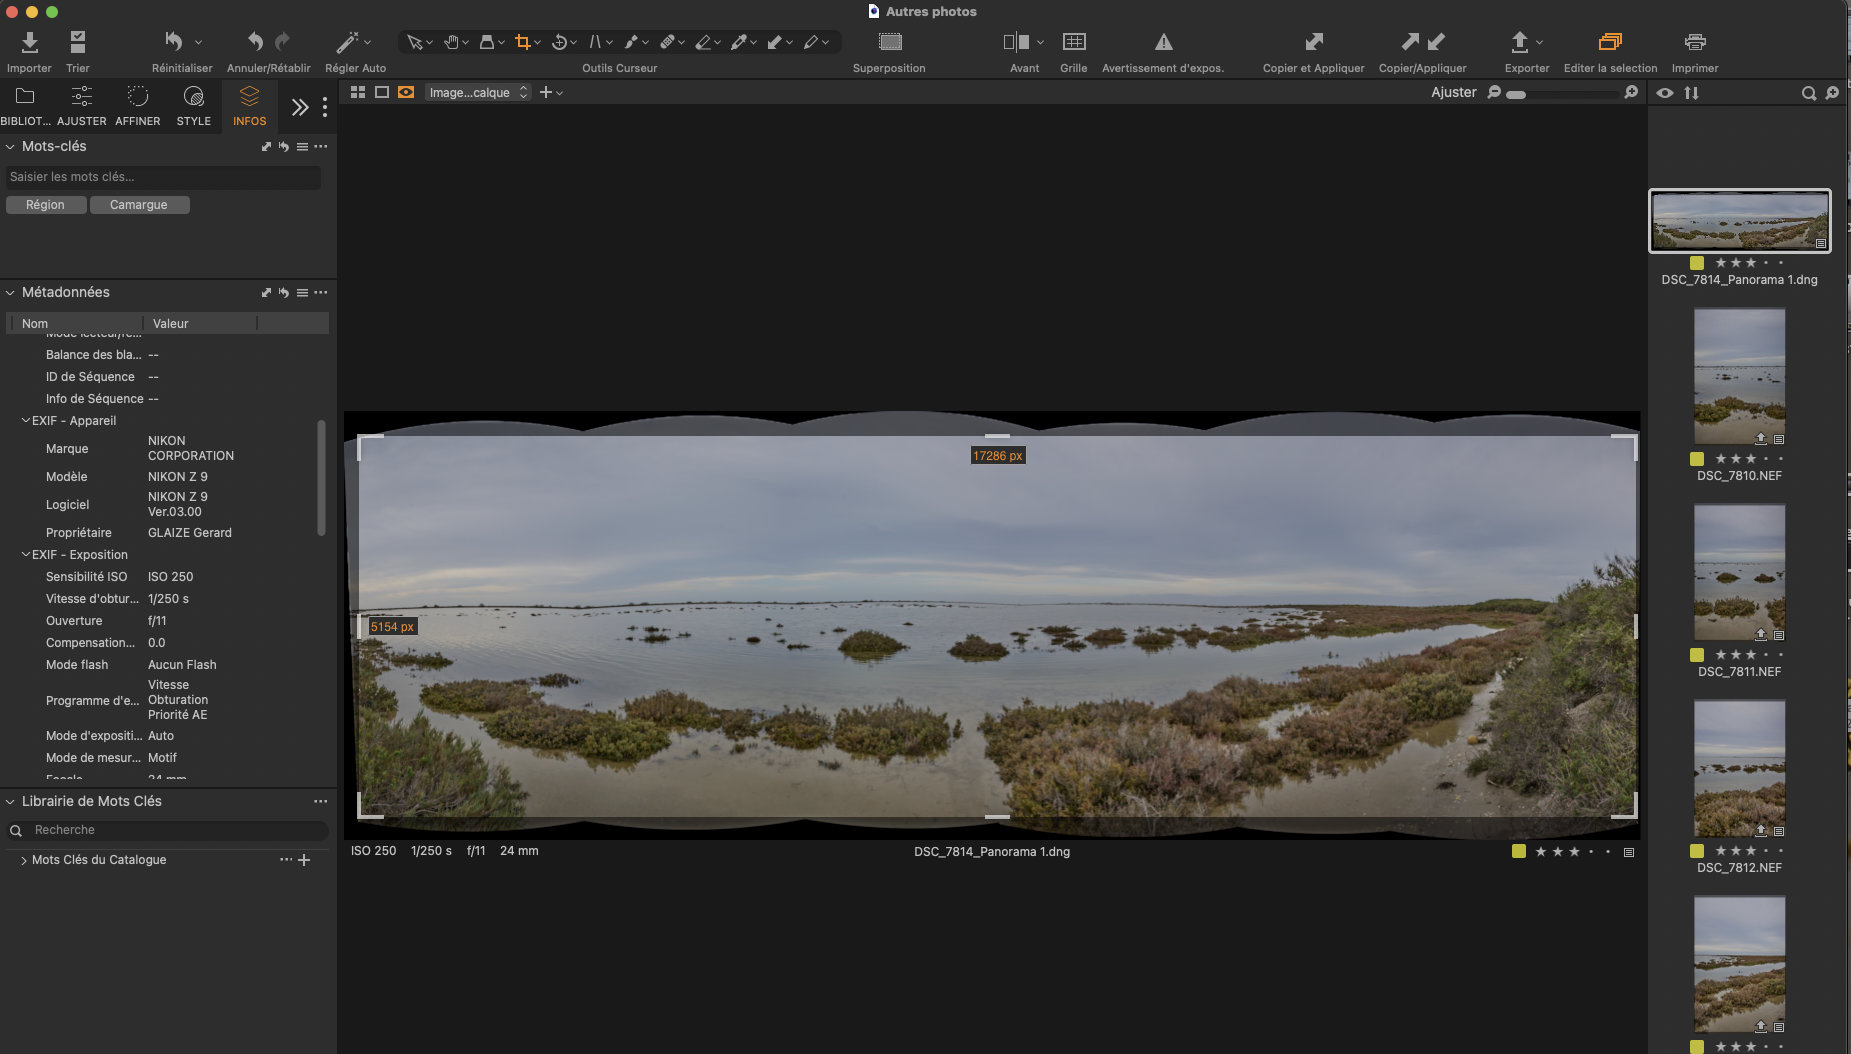
All that remains is to crop the panorama. Assembling a panorama with Capture One Pro is therefore relatively simple.
The results :
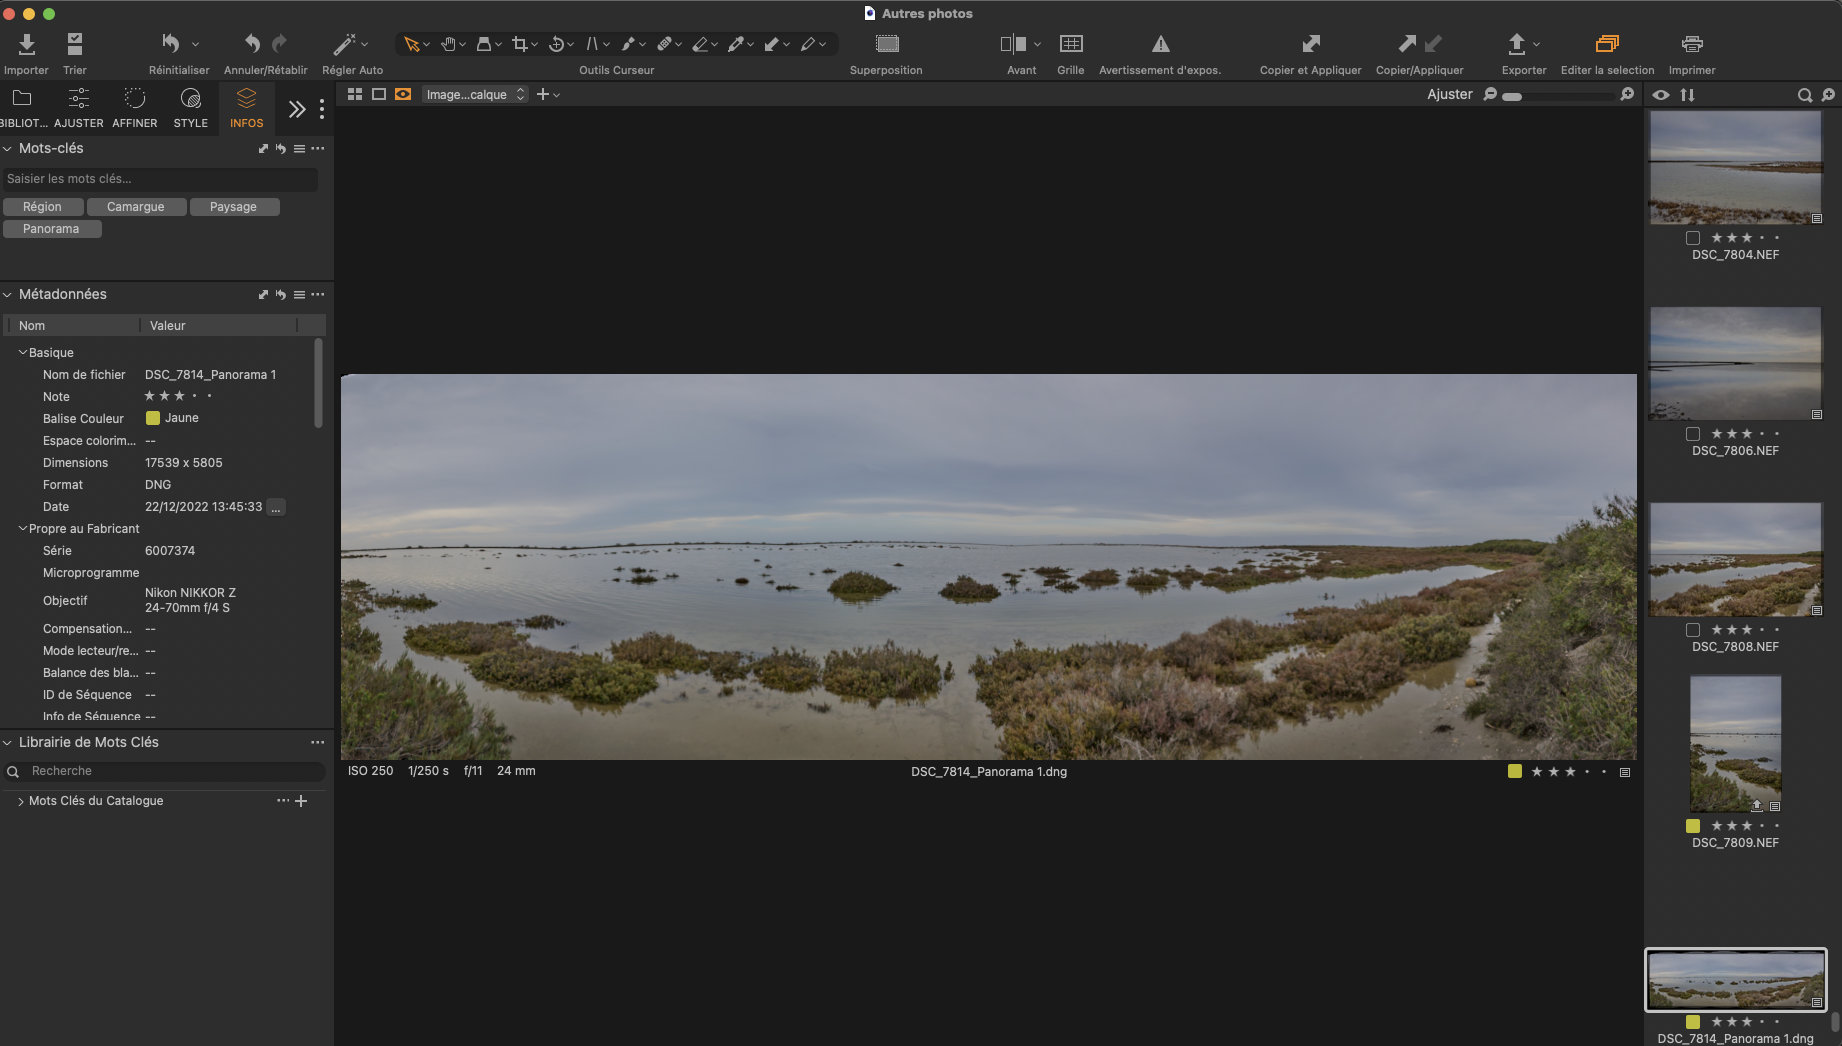
We thus have our final panorama. In the Metadata Info section, with the cylindrical method of Capture One, this panorama has a dimension of 17,539 pixels x 5,805 pixels, either a ratio of 3.00.
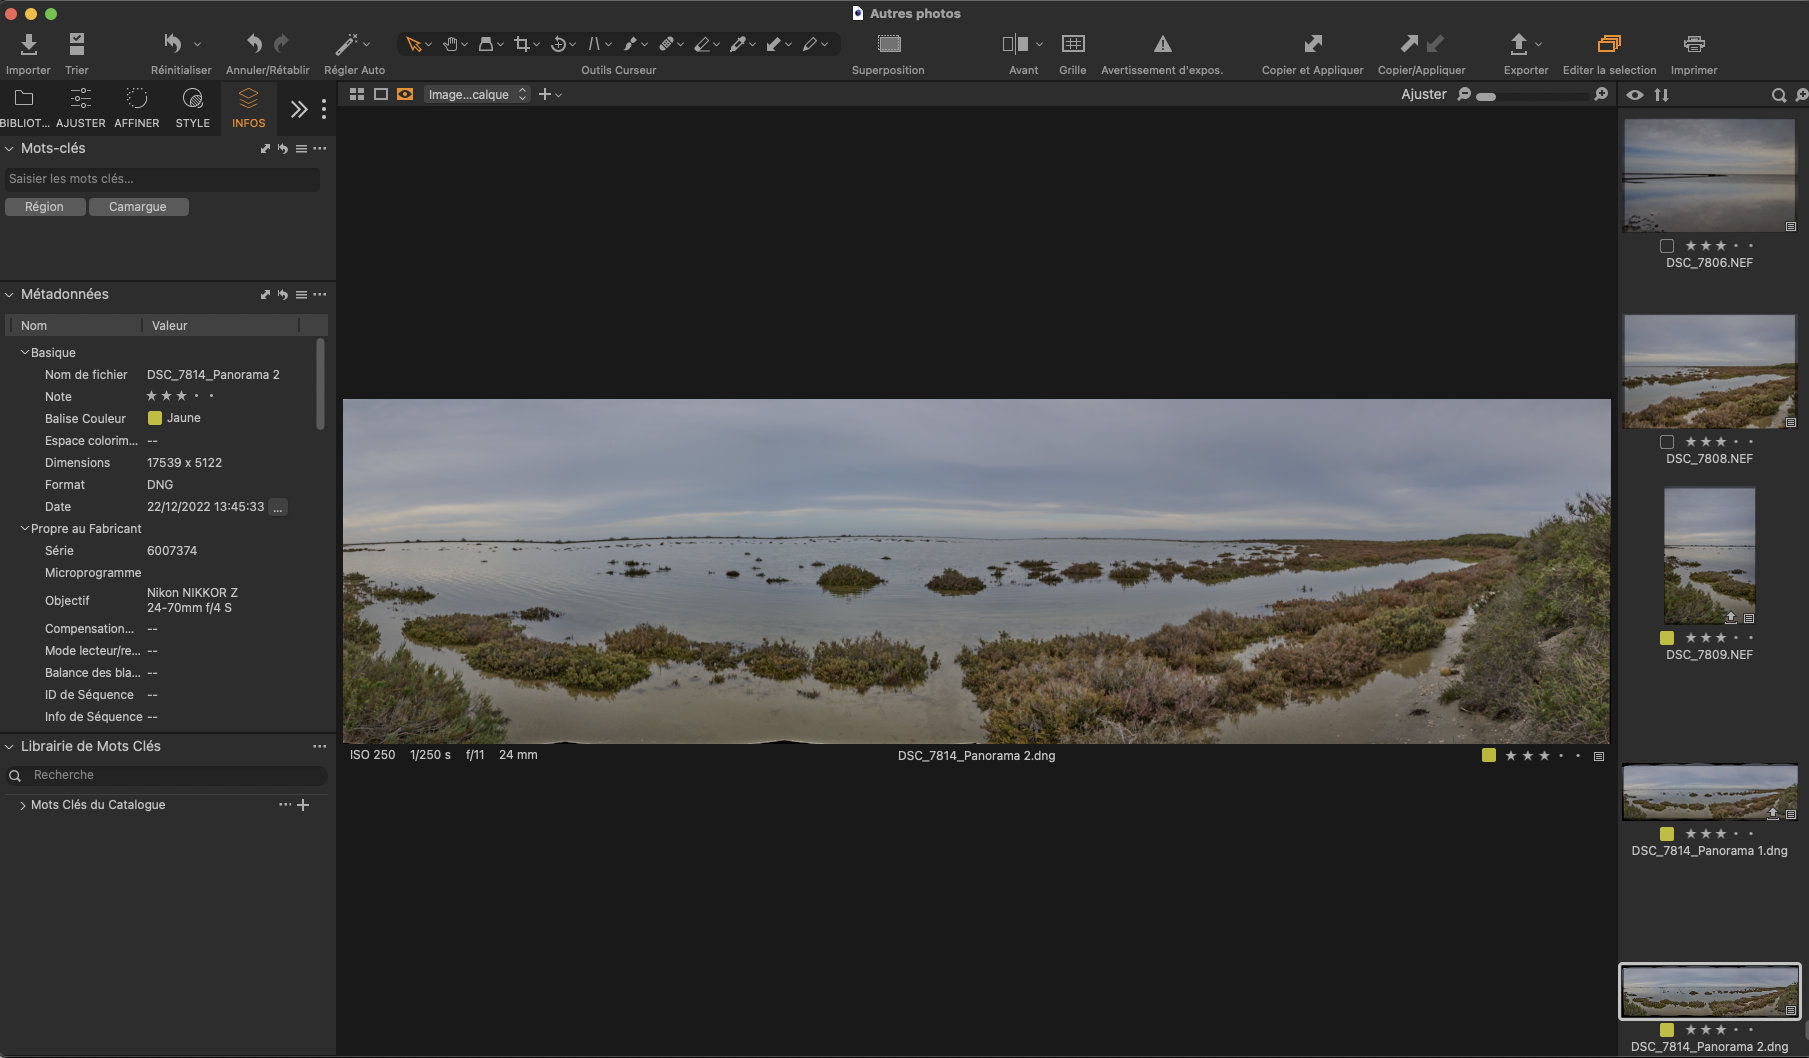
In the case of the panorama created with the Spherical method of Capture One, in the Metadata Info section, we can see that this panorama has a dimension of 17,539 pixels x 5,122 pixels, or a ratio of 3.40.
We therefore see that depending on the method used, the result is different. The width of the slideshow in both methods is strictly identical (17,539 pixels), but the height is different (5,805 pixels cylindrical method, and 5,122 pixels spherical method.
Stitching a Panoramic photography with Affinity photo

To create a panorama with Affinity Photo, in the application menu you choose “File” then “New panorama”.
Then you select “Addition”, and you select from your disk the photos to compose your panorama.
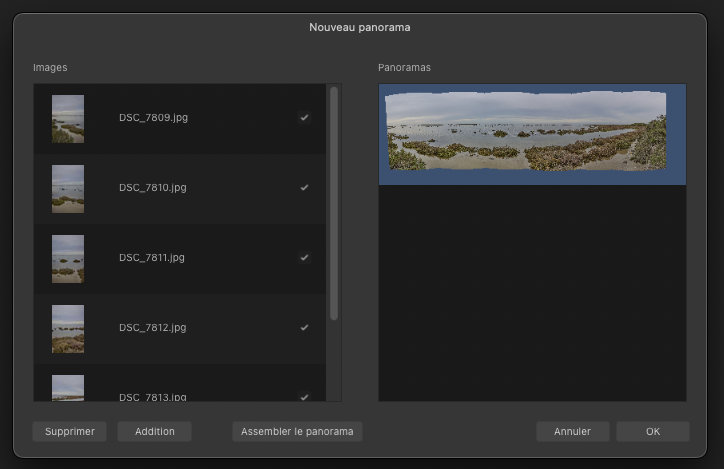
Once the photos have been selected, you validate “Assemble the panorama”, here we have no choice on the method used.
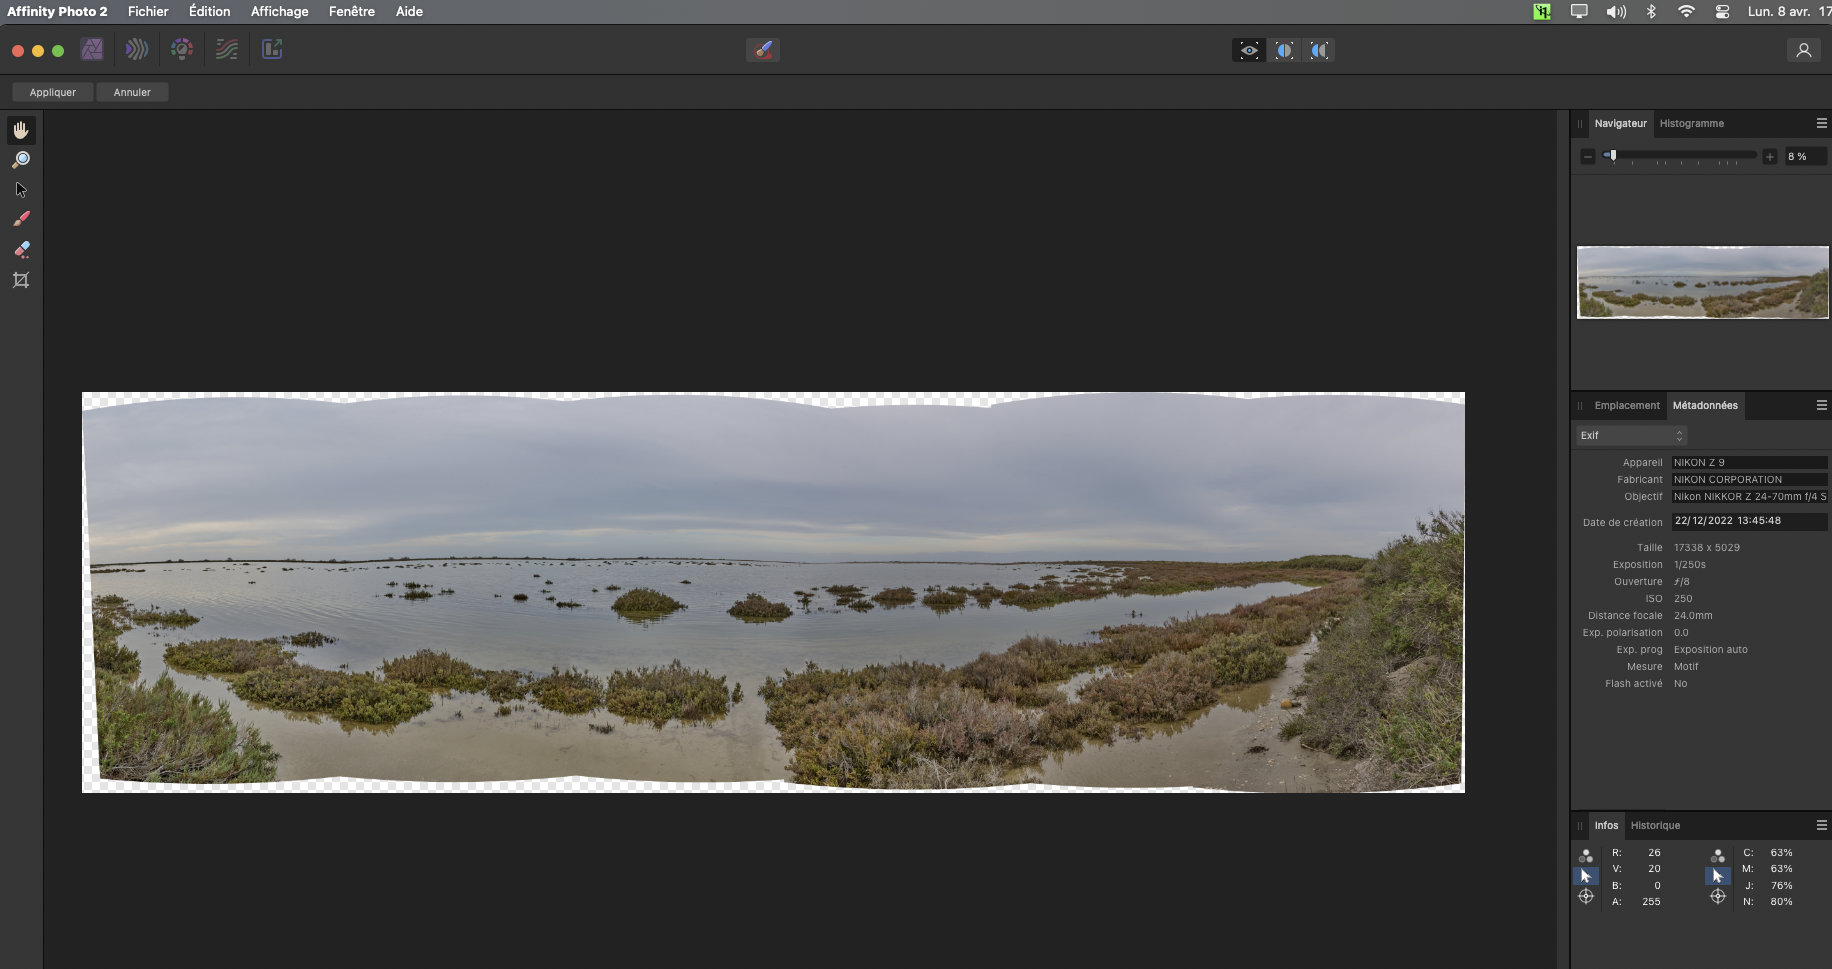

Then, all you have to do is crop your panorama correctly.
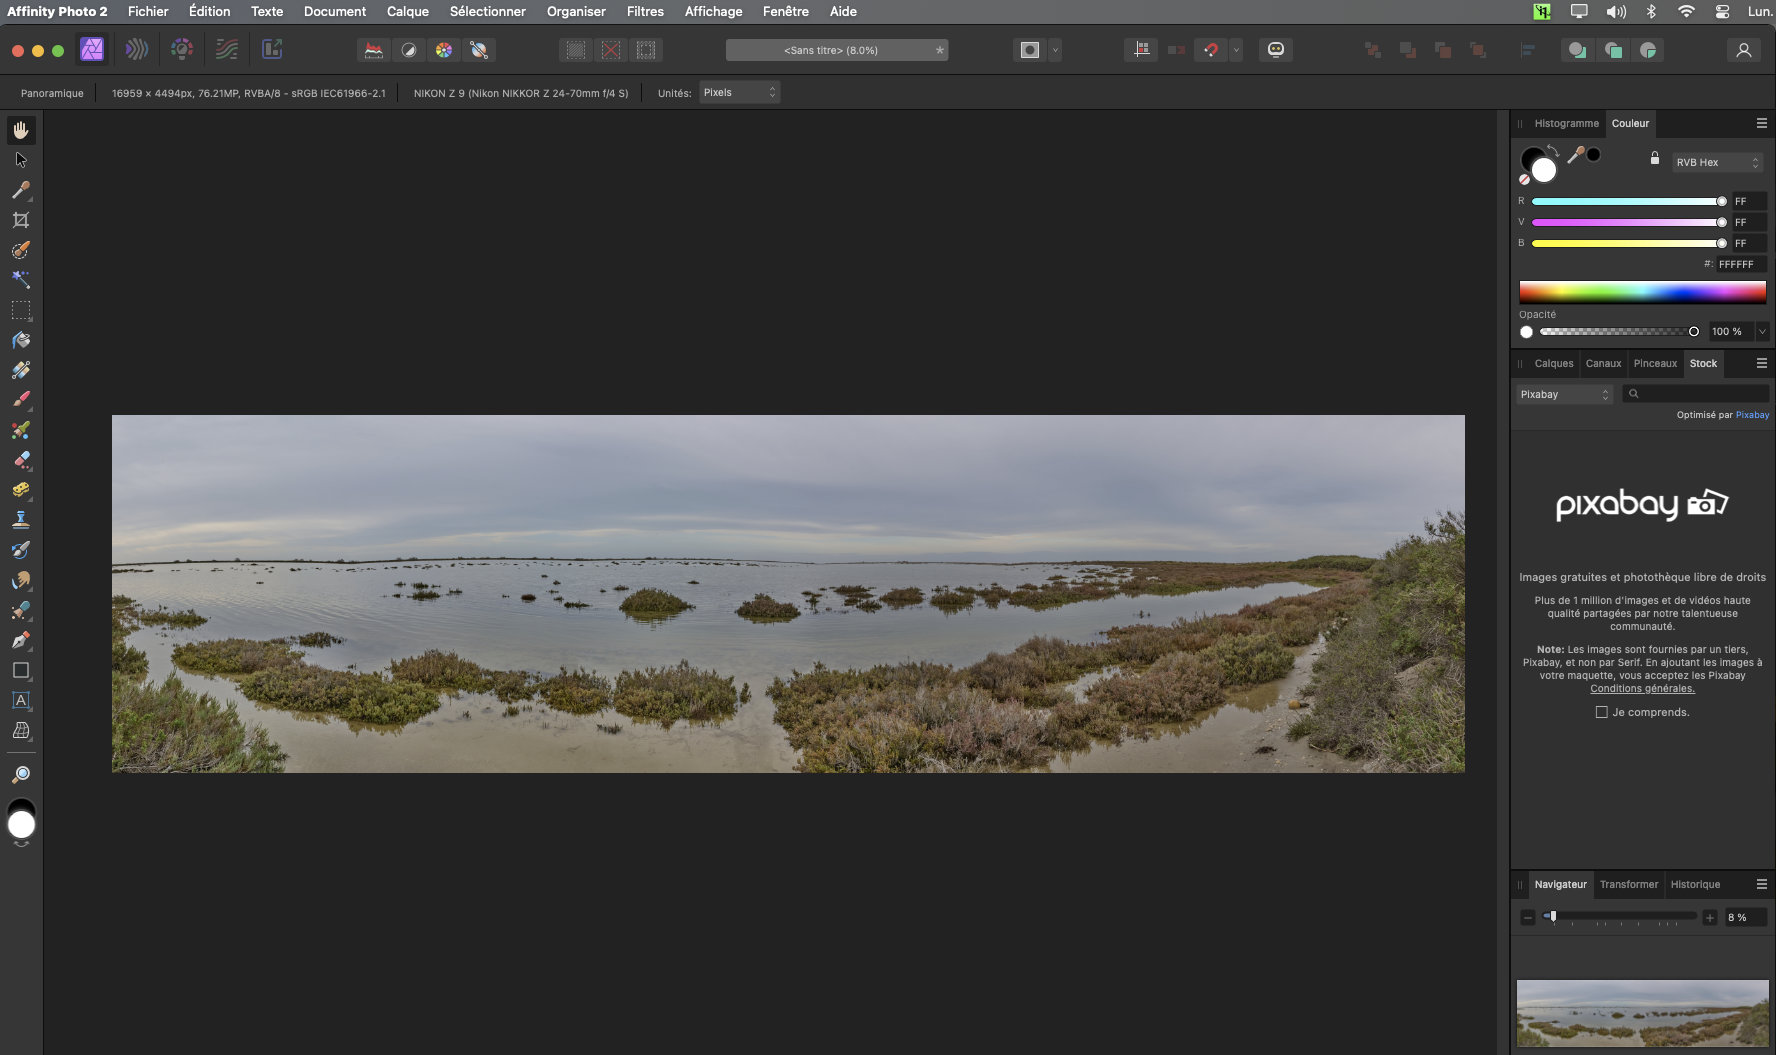
We thus have our final panorama. In the Metadata Info section, we can see that this panorama has a dimension of 17,338 pixels x 5,029 pixels, either a ratio of 3.45.
The procedure for creating a panorama in Affinity Photo is very simple and can be too basic (no choice of projection mode in particular).
Comparison of our two panoramas
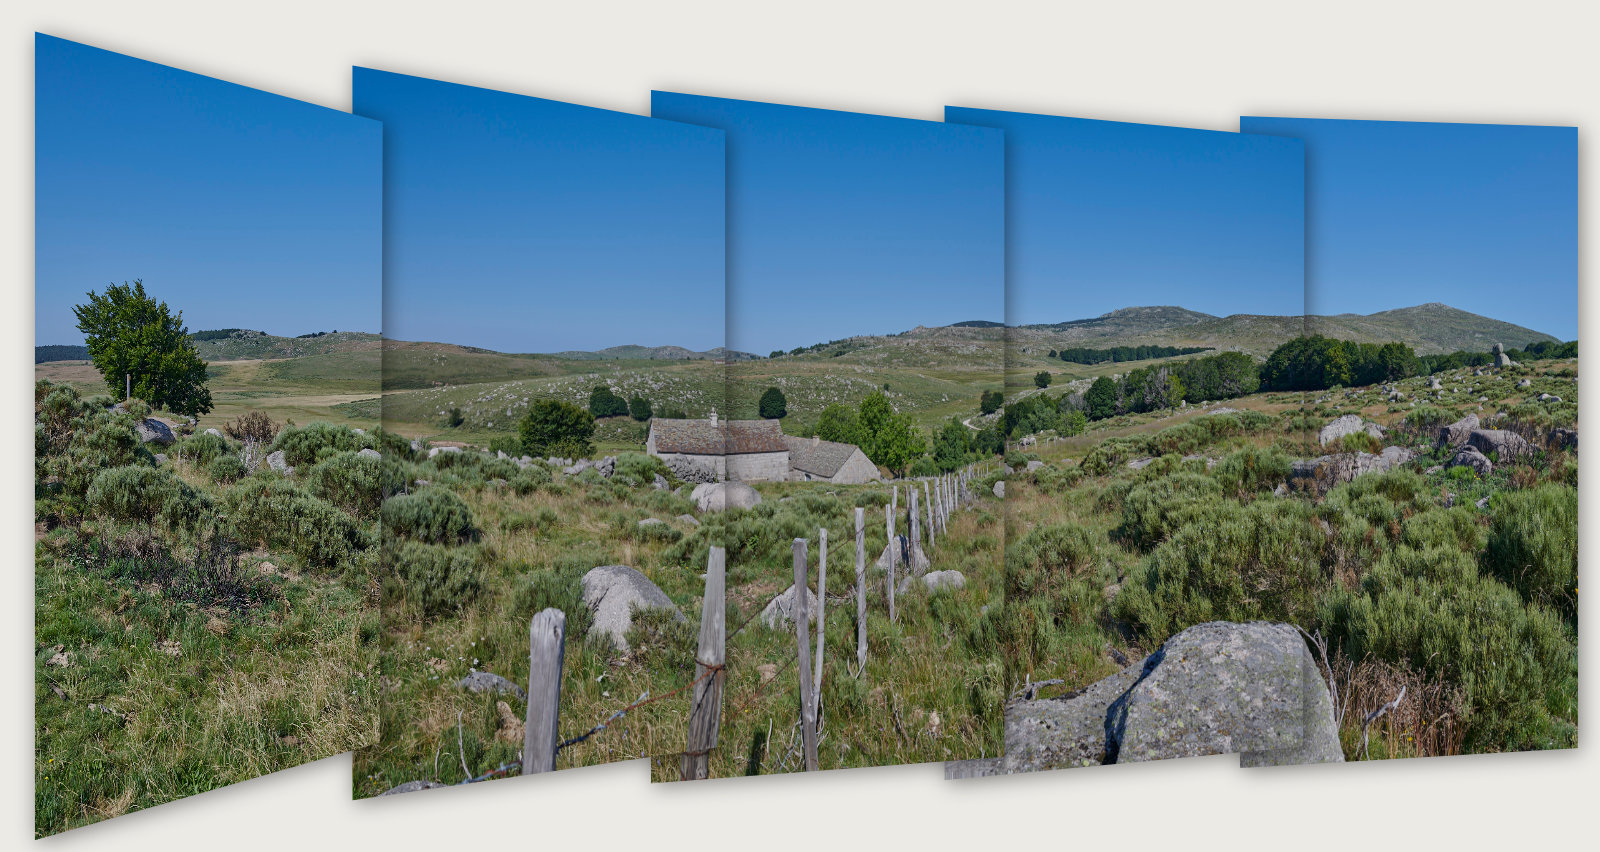
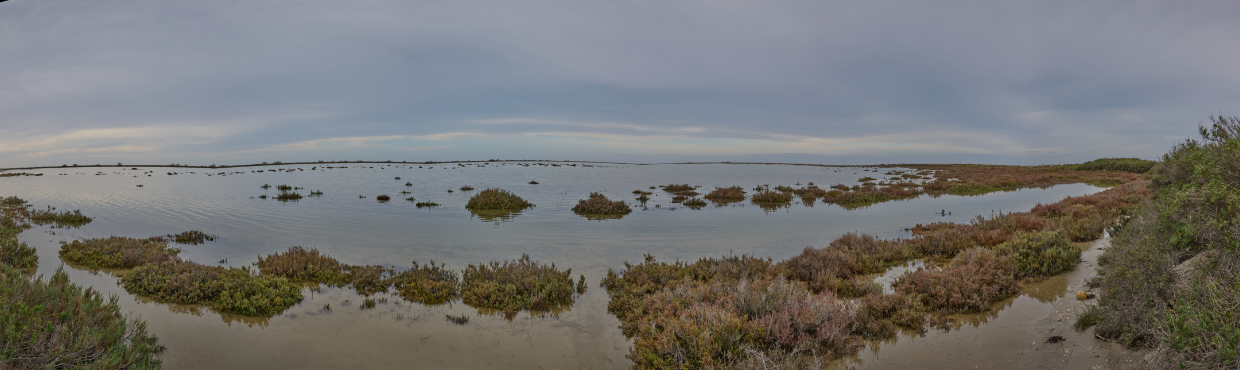
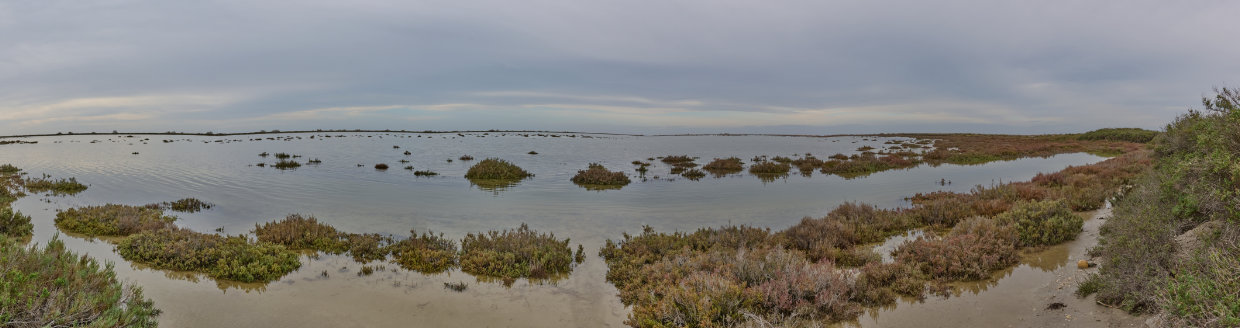
(1) These two panoramas, however, have a flaw. In fact, we see with both software that the horizon line presents a curvature at the level of each photo. This is probably due to the fact that the photos making up this panorama were taken hand-held, and that the rotation relative to the nodal point is not good, and (or) is not on a perfectly horizontal plane.
Another difference is the final dimension of the panorama, even though we used the same photos:
- with Capture One Pro dimension de 17 539 pixels x 5 805 pixels, either a report of 3,00 (cylindrical method)
- with Capture One Pro dimension de 17 539 pixels x 5 122 pixels, either a report of 3,40 (spherical method)
- with Affinity photo dimension de 17 338 pixels x 5 029 pixels, either a report of 3,45.
The panorama produced with the Capture One (Spherical method) is similar to that produced with Affinity Photo which does not offer a choice of method. (report of 3,40 and 3,45)
In all three cases, the width of the panorama is slightly less than our initial calculation (17,960 pixels). The problem probably comes from the fact that the photographs being taken freehand, the recovery rate is not precisely known, and can vary from one photo to another.
Concerning the height 5,392 pixels in our initial calculation, it is lower than the cylindrical method of Capture One, but higher than the other two cases.
Conclusion
In conclusion to this article on panoramic photography, we can see:
- that assembling a panorama with these two software is relatively simple.
- on the other hand, the entire quality of the panorama will depend on the care taken in taking the photo.
- regularity of exposure of different photos
- respect for a constant depth of field
- respect for a constant overlap of views
- rotation of the device around the nodal point
- rotation on a perfectly horizontal plane
Personally, I prefer working with Capture One Pro, for two reasons:
- Capture One allows you to choose the projection method, which Affinity Photo does not offer.
- Finally, using Capture One Pro allows me to integrate the panorama assembly work into my Workflow (photo processing, choice of photos, assembly, final retouching of the panorama).
There are certainly other panorama stitching software, but the aim of my article was not to list them all.