Workflow concept
Summary
Preamble
Workflow with Capture One Pro
- Importing photographs
- Sorting photographs after import
- Processing and optimization of photographs
- Photo library management
- Publication on my personal website
Tutorials
PREAMBLE
Digital technology has revolutionized photography, resulting in many amateur photographers ignoring the “Concept of Workflow”, and feeling out of the game when it comes to digital post-processing. However, it is not as difficult as you might think to achieve a consistent production of professional quality photographic images.
Concept of optimizing photographs
At the time of the Argentic:
With film, optimization already begins with the choice of film used according to the subject to be treated: sensitivity, saturation, grain, etc., (to be compared to the settings you apply to your camera).
Then this optimization continues under the enlarger:
- with the choice of paper and its grade, or filters used with multigrade papers,
- the masking of certain areas of the image, to avoid overexposure of these areas and increase the exposure time to clear other areas,
- possible cropping,
- the inclination (rocking) of the tray supporting the paper for perspective corrections,
As you can see, these actions are largely the same as those done today in digital file processing computer software, for example.
The points to be optimized are often the same (saturation, contrast, high and low light, cropping, etc.)
Since the beginning of photography, photographers have optimized their images in the darkroom.
With the digital :
The difference is that today we use a digital darkroom (our computer) instead of the traditional darkroom. The evolution of technology today makes this work easier and faster, but it remains just as essential.
Digital sensors and film are marvelous tools with their own strengths and flaws. However, they will never be able to capture the dynamics and nuances that the human eye is able to perceive, and especially to interpret. It is therefore up to the photographer to put their personal stamp in an image through careful editing and post-processing to make the image impactful.
Some consider numerical optimization to be cheating. I think you have to make a distinction between “image optimization” and “image editing”. Image optimization has always existed in photography. Having done printing under an enlarger, I can confirm that this optimization was as essential as it is today in digital.
For my part, I consider that “image editing” concerns the professions of graphic design or advertising, and in this case, we move away from photography as we can conceive of it as art, or as a purist. However, this view of things only engages me…
Workflow concept
The term “Workflow” refers to the modeling and IT management of all the tasks to be performed in the realization of a business process (in our case photography).
Before Shooting :
The different phases or processes of the work cycle :
Camera setting: as soon as the shot is taken, I only work in Raw (Nikon’s NEF file), although the camera is capable of producing quality Jpg files. (In fact the Jpg is a raw processed by the camera with the internal software of the camera and the settings that you have applied to your APN…)
However, only a Raw file allows you optimal editing and personalization of your photo. On a Jpg file, the possibilities of processing are more limited under penalty of degradation of the file.
If you work in RAW, you can afford to skip some settings when shooting because they will be adjustable later when processing your Raw files on the computer.
A few changes to the camera settings, depending on the shooting conditions:
- Image Adjustment : Standard – Neutral or Saturated
- Active D-Lighting : Normal – Low or Off
- Noise Reduction: Low – Off
- Regarding the white balance: I trust the camera, leaving it on Auto.
- Iso sensitivity: I like to choose the sensitivity, but sometimes I also work in automatic Iso, if the light is too changeable, and in wildlife photography in particular where action scenes are often very fast.
After Shooting :
Your workflow should allow you to do the following :
- Import and classify
- Sort and archive
- Referencing
- To safeguard
- process
- Publish (if you have a website or blog)
Several methods or tools can be used to achieve this workflow:
- You don’t want to invest or learn specific software… In this case, organizing your disk with directories and sub-directories to classify and archive your photographs after manual sorting is an alternative. This restrictive method is only possible on small volumes of photos. You will very quickly have difficulty finding a specific photo (or a series of photos on a theme). Referencing being impossible in the absence of a database, the only marker you will have to find a photograph will be the name of your directories or sub-directories…
- Use specific software that integrates a database allowing you to perform all the operations of your workflow. Among these software, the best known are Lightroom from the Adobe editor, Capture one Pro from Phase One, DXO, etc… Most of this software exists in Mac OS and Window versions. Photo software is provided with the operating systems (Photo at Apple, and Ditto at Microsoft). Although having more basic functions, this software is likely to suit the needs of certain photographers.
WORKFLOW WITH CAPTURE ONE PRO
For managing my photo library, I use “Capture One Pro” from Phase One on Mac. Previously I used Apple’s Aperture. However, I had to migrate my photo library to Capture One Pro, because Apple decided to no longer develop its software. After having tried several software (Lightroom, Dxo Optic pro…) my choice fell on Capture One Pro.
Several reasons led me to choose this one:
- the possibility of organizing the interface at my convenience (possibility of adding or removing tools) and of personalizing its workspace.
- The most important point, a very powerful and very fine Raw file processing engine, the delicacy of rendering, the fineness of the details, a better smoothing of the image, an optimized noise management, the liveliness and the brilliance of the colors . This is particularly true as soon as one increases in sensitivity. In high Isos, Capture One Pro works wonders.
- Software devoid of gadgets, unnecessarily cluttering the working interface.
Importing photographs
Import to computer :
After shooting, I import my photographs on the computer. To do this, I use a “Sony” card reader capable of reading XQD and CF Express cards.
I create one folder per shooting session, each folder corresponding for me to the good old roll of silver peloche. These files include a number that allows me to:
- to have a chronological classification on the working disk of the computer,
- a designation of the place and the date (in the form month/year).
I advise you to always keep the same tree structure on your computer disk and to avoid modifying it…
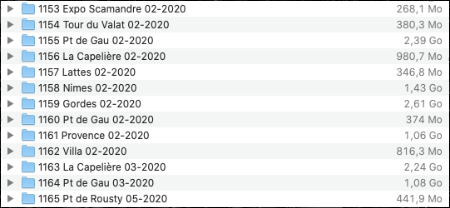
Tree view on my Mac’s diskc
At this point, I make a backup of my working disk on an external disk, before erasing and reformatting the memory card of camera.
Import to photo library :
I import my photographs into Capture One, with the following options:
- I leave the original raw files of my photos in their original locations on the Mac disk, as defined in the “Importing Images” section.
(Capture one offers the possibility to store raw files in its “catalog”). - I apply a custom setting depending on the nature of the imported photos. (Capture Styles One)
- This personalized setting also includes the assignment of a “3 star” rating which constitutes an average starting rating for the rest of my processing flow.
For the classification in the Capture One photo library, I created a “Project” per year, inside the project, I created an “Album” per work sequence, sometimes a “Group” which can group several albums.
Example: The project “Year 2017”, inside a group “973 Prats de Mollo 06-2017”, inside the group “973 Prats de Mollo 06-2017” several “Albums” corresponding to hikes or places different during the Prats de Mollo stay.
(The designations “Group” “Project” “Albums” are specific to Capture One and may differ in other software.)
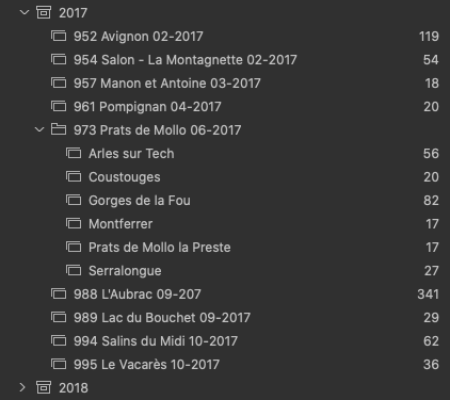
Capture one Pro catalog screenshot
While importing photos into Capture One’s library, the software will:
- create dynamic photo previews.
- reference photos by reading Exif data.
- possibility to apply a style (predefined style, or user style)
- back up to a predefined location (optional)
Personally, I make my backup as soon as I copy my XQD or CF card to the computer. (so before importing photos into Capture One)
Sorting photographs after import
Before processing the photographs, I proceed to a first sorting; I delete photos with blur, duplicates, bad framing etc… The rejected photos will end up in Capture One’s trash. Photos thus rejected during the “Sorting Photos” phase can be viewed before emptying Capture One’s Trash and permanently deleting them from disk.
Please note that Capture One’s recycle bin is independent of the Computer’s recycle bin (on Mac)
- I assign one or more “key words” to each photograph. These keywords will allow me later to do research in the catalog of the photo library.
Capture One has sophisticated keyword management, these can be prioritized:
example: I can create a keyword “Shelduck-Belon”, attach it to a keyword “Duck”, itself attached to “Birds”. I can thus do research at several levels; either search for photos of all birds, or all Ducks, or only Shelducks. - Shooting location, (country city region)
- CO can record GPS coordinates if your device is equipped with this module.
- Legend.
- Color label.
example: I assign a yellow label to all the photos that are part of a panorama.> - I refine the classification in the form of a star, (compared to the 3 stars automatically assigned when importing photos).
All of this information will make it possible to search for photographs in the photo library on these different criteria.
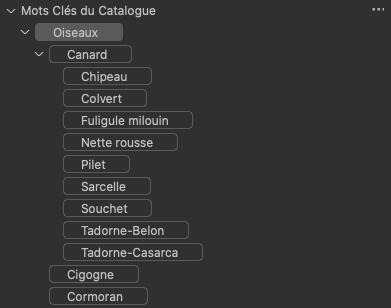
Screenshot of CO keywords
Processing and Optimization of photographs
Capture One Pro includes a number of tools for processing and optimizing digital files, to name the main ones:
main tools :
- Exposure Compensation
- Exposure
- Contrast
- Brightness
- Saturation
- HDR
- High light
- Shadow
- White
- Black
- Clarity
- Vignetting
- White balance correction
- Color Editor
- Black and white
- Sharpen Sharpen
- Noise reduction
- Spot removal
- Moire
- Lens correction
CO has a very large number of optics from different manufacturers.. - Purple fringes
- Cropping
- Rotate and Flip
- Perspective correction
- Levels – RGB channel
other tools that facilitate the work of optimizing images :
- Tool see Before/After correction
- Grid
- Magnifying glass
- Exposure warning
- Auto adjustment of different elements to select (exposure, hdr, contrast, level, etc…)
other possibilities of the software :
- Ability to create multiple variants of an image, which are automatically numbered and stacked.
- Ability to create layers (adjustment, correction, duplication). These layers make it possible to carry out very localized interventions.
- Capture One allows you to take settings from a previously processed photograph, and apply these settings to a set of photos. This method allows me to work quite quickly, with the possibility of then refining the treatment photo by photo if necessary.
In my workflow, I only do “optimal” optimization when using a photograph, especially for exposure prints.
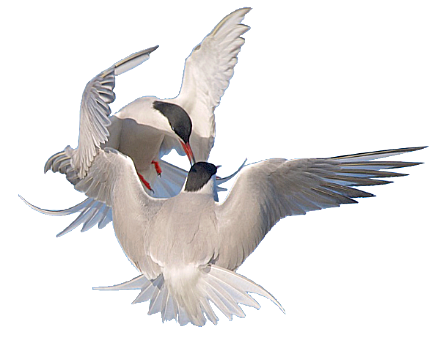
Example of file processing in Raw :
Picture BEFORE processing 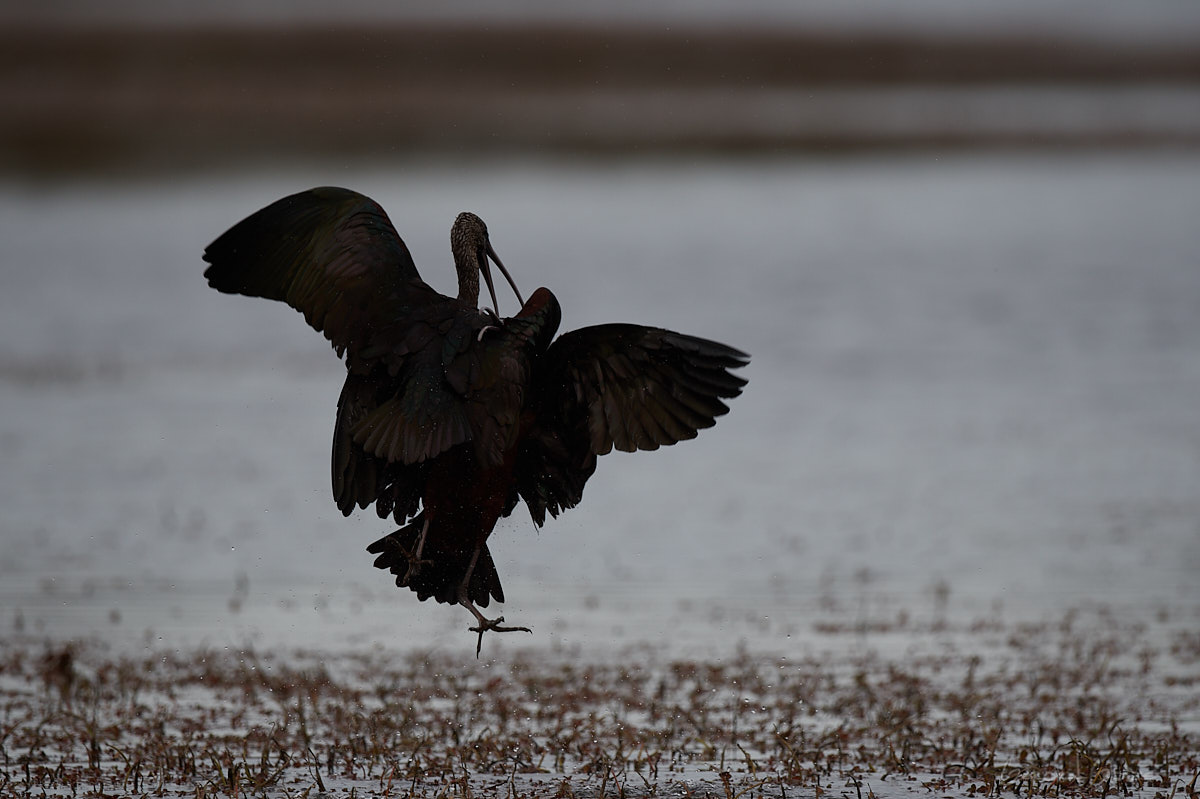 AFTER processing
  with Capture One Pro
Quarrel of Glossy Ibis
I took as an example this photo of two glossy ibis in full quarrel. As soon as the light conditions are not optimal, this bird is quite difficult to photograph. Indeed for those who do not know this bird, at first glance it may seem black, however it has feathers of a rust color with metallic green tints. Head and neck are paler. Only a photo taken in Raw can recover the colors and texture of the plumage correctly.
Photo library management
From Capture One, a large number of operations concerning the exploitation of the photo library can be carried out, to name only the main ones:
- Search according to different criteria (keyword, label, classification, etc.)
- Create smart albums. These dynamic albums are fed from defined criteria (keywords, label, classification, etc.)
- Photo printing:
The print module allows you to create and save print presets (paper size, orientation, margin, border, printer color profile, etc.) - Photo export:
The export module allows you to create and save export presets (size, definition, image format, embedding of a logo or signature), and allows you to export a whole series of previously selected photos in a single operation.
Capture one includes an online help site accessible from the question mark present on all the software tools, and allowing direct access to the corresponding help chapter. Very convenient…
Publication on my personal website
I use the CO Pro export module to generate the photos to be published on the “Oiseaux de Camargue” website.
The configuration of the CO export module allows me to:
- resize the photo to 1600px x 1065px.
- generate a quality Jpg file, and lighter for the web.
- optionally apply an emphasis setting specific to the screen.
- keep some metadata (copyright & shooting exifs).
- apply a watermark or logo specific to my site.
TUTORIALS
Notion of colorimetry
Additive synthesis :
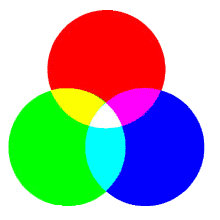
- Complementary color of cyan is red.
- Complementary color of yellow is blue.
- Complementary color of magenta is green.
Subtractive synthesis
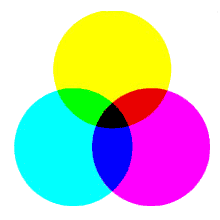
- Black with cyan, magenta and yellow filters.
- Red with magenta and yellow filters.
- Green with yellow and cyan filters.
- Blue with magenta and cyan filters.
Black and white in digital photography
Black and white photography is an art in its own right. She brings a dose of mystery, timelessness, and magic to the images. Certain textures are often magnified by black and white.
If we want to make a good black and white photograph, we preferably need strong contrasts as well as many different shades of gray. In black and white, as there is by definition no color, you can only play with light tones and dark tones.
The transition from a black and white photograph is mainly based on two techniques:
- retouching the contrast and brightness of certain areas of the image.
- retouching the brightness of certain colors in the image.
The retouching of the luminosity of certain colors of the image (technique n° 2) is specific to the conversion of an image in black and white. In some software, you can apply color filters whose effect is similar to the color filters used for film photography.
The filters have the particularity of stopping part of the wavelengths corresponding to their complementary colors. They allow the wavelengths corresponding to their own colors to pass. Thus these filters attenuate their own color while reinforcing their complementary color.
Converting a Digital Photo to Black and White :
Picture BEFORE processing 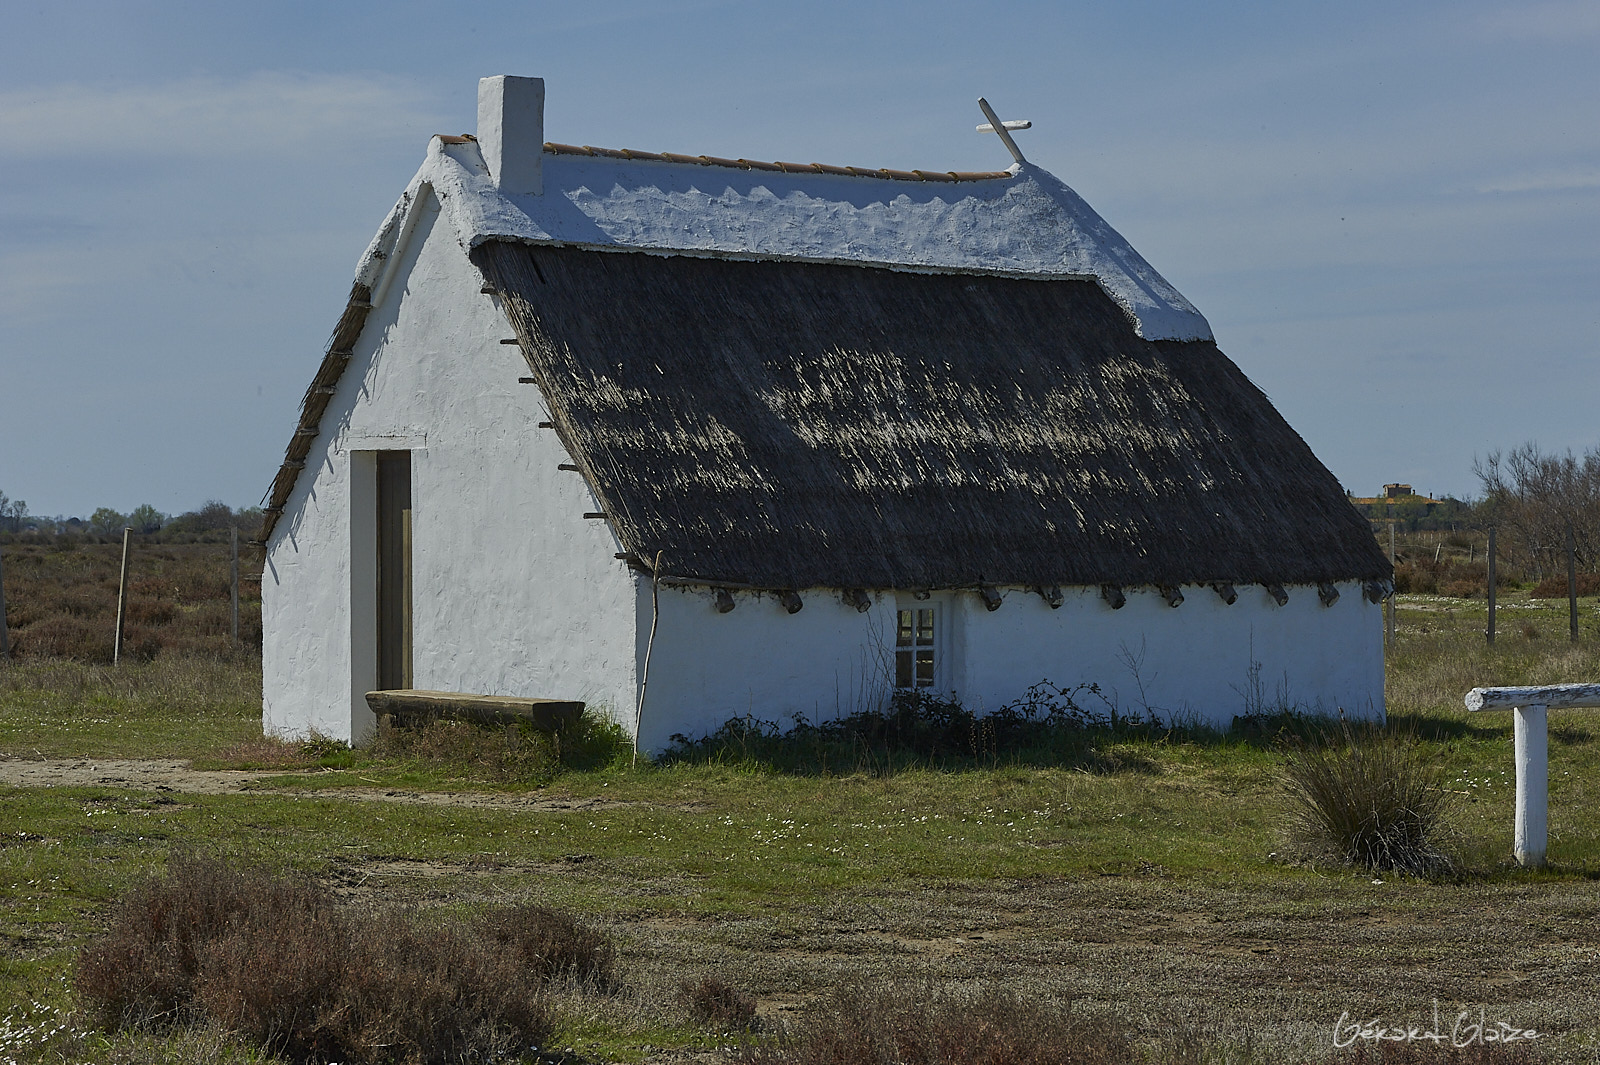 AFTER processing
 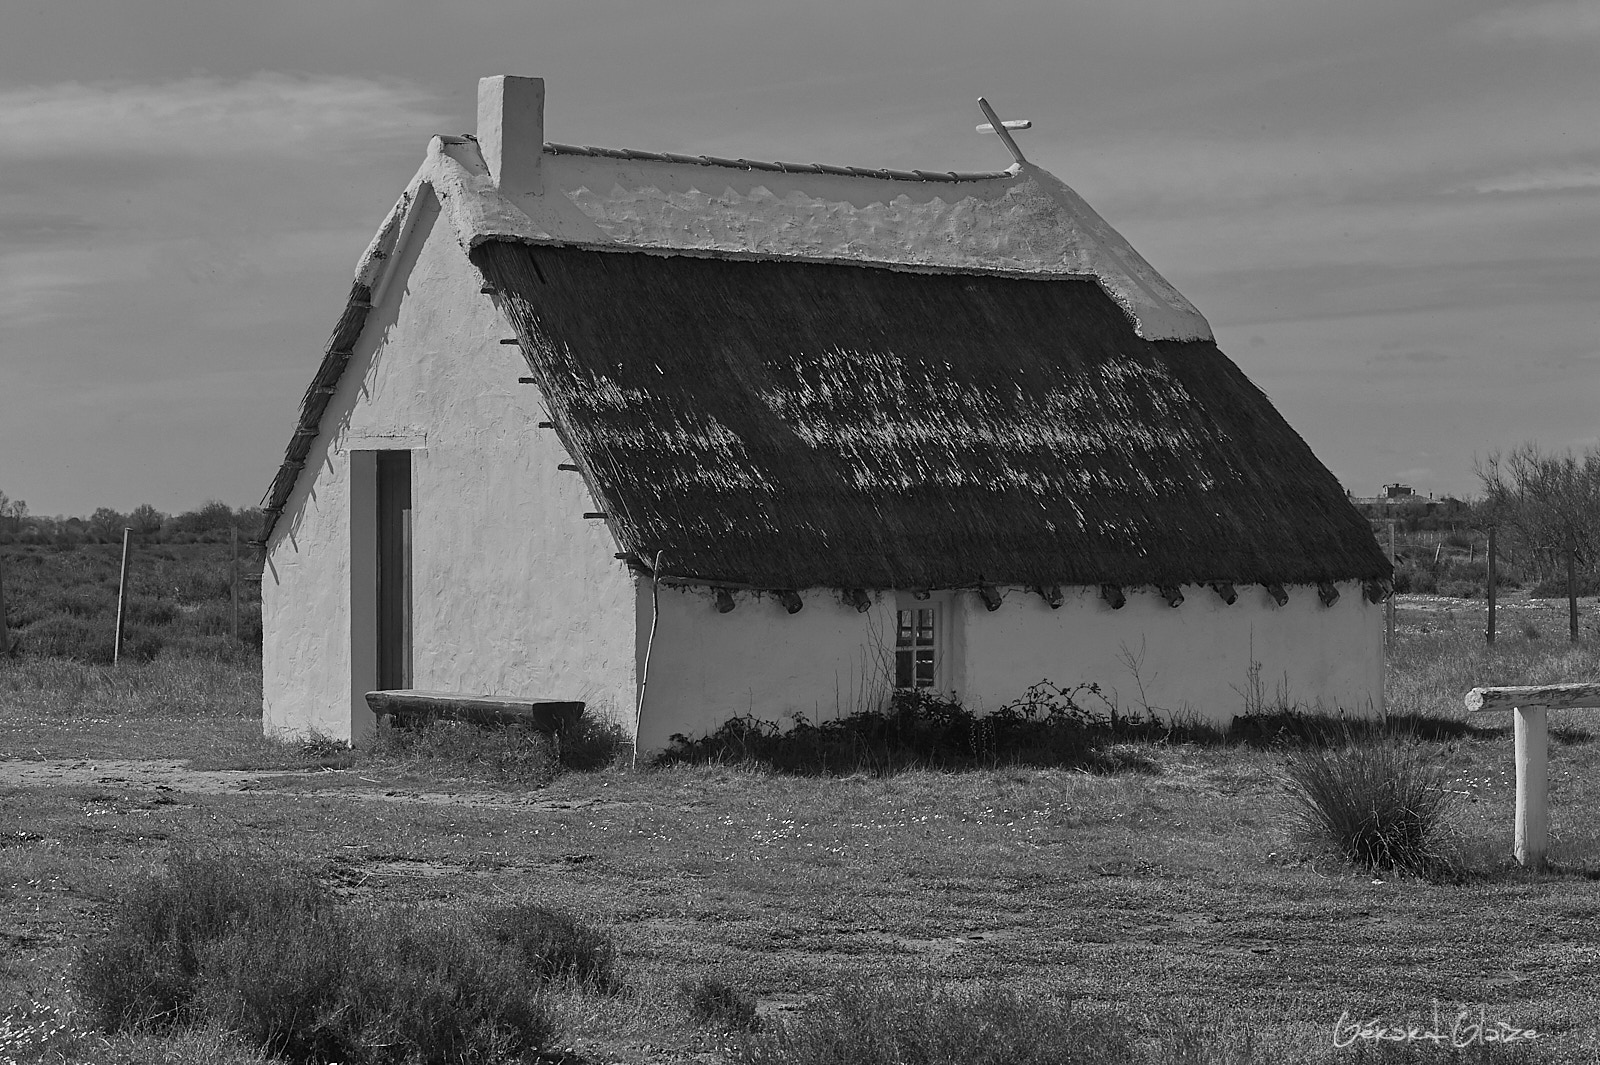 with Capture One Pro
Traditional Camargue cabin
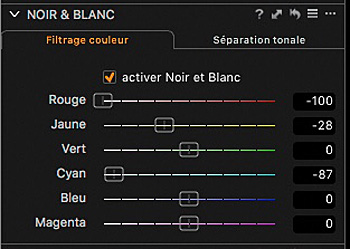
Filters in Capture One Pro
In Capture One Pro, the black and white conversion tool, is based on this principle of color filtering:
The first 4 filters correspond to those used in film photography, sometimes with different gradations, the last 3 filters allow you to refine the filtering
- Red filter: primary, brightens reds and strongly darkens blues and greens, strongly reinforces clouds and dramatizes a blue sky.
- (red 100%, green 0%, blue 0%)
- Yellow Filter: Secondary, brightens yellows and darkens blues and purples. Ideal filter for landscape.
- (red 50%, green 50%, blue 0%)
- Green filter: primary, brightens greens and darkens reds, perfect for photos of vegetation.
- (red 0%, green 100%, blue 0%)
- Orange filter: tertiary, brightens reds yellows and oranges, darkens blues and purples.
- Cyan filter: secondary, to let through Cyan but also Green and Blue. He stops his complementary color, Red.
- (red 0%, green 50%, blue 50%)
- Blue filter: primary, to improve shots from afar by accentuating the haze. It stops red and green.
- (red 0%, green 0%, blue 100%)
- Magenta filter: secondary, it stops its complementary color, green.
- (red 50%, green 0%, blue 50%)
Primary, secondary and tertiary colors:
- Primaries are: Red, Green and Blue.
- Complementary colors: magenta, cyan, yellow.
- A Secondary corresponds to the addition of two Primaries in equal parts.
- A Tertiary is obtained by adding, in varying proportions, a Primary and a Secondary.
For a given color, its complementary color is the one which, added with it and having no common point with it, will give White.
Capture One Pro Black and White Tools
Quote of the moment
I crop for the benefit of the photos. The world just not doesn’t fit easily into the format of a 35mm camera.
Useful Links :
- The official Phase One website
- Affinity Photo’s official website
- Phase One Tutorials on Capture One Pro)
- Capture One Pro video training on the Tuto.com website (Paying – in French))


Voir aussi - See as well
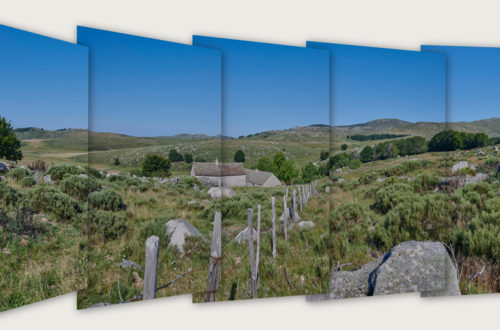
Panoramic photography
The different image formats